Trail Ready: Five Pilates Exercises for Mountain Bikers
The weather is warming up, the birds are singing and nest building, and the days are getting longer. Spring flowers are all around us. All signs point to more regular mountain biking just around the corner. But the big question is: Are you trail-ready?
While your mind is buzzing with the excitement of less hassle, less gear, and more outdoors, your body might not be on the same page. If you’ve been “hibernating” a bit this winter, jumping full-tilt back into a high volume of outdoor activities creates a real potential for injuries.
Luckily for those living in Western North Carolina, we know several “false springs” occur before the weather truly levels out. This transition is a gift, allowing us time to ready our bodies so we can safely go all-in on the trails again.
Efficient Prep: Pilates Exercises for Biking the Trails
I’m sharing five Pilates-based exercises with the mountain biker in mind. These exercises incorporate multiple body regions into each movement, similar to the way our body naturally works in the real world. Multiple body regions in each exercise also means an efficient use of time and effort to get the most impact for your uptick or return to mountain biking.
These exercises are not a legs only approach. Riding on trails requires dynamic movements, weight shifting, and counterbalancing. Mountain biking utilizes leg strength, shoulder stability, core stability and strength, neck stability, and arm strength. Good riding requires endurance and power.
Unlike weight lifting, these exercises don’t need to be three sets of 10 repetitions.
- Some exercises are done slowly with lots of repetitions to train endurance and proper movement patterns.
- Other movements are done with some slow repetitions followed by faster ones to facilitate using proper form followed by training power in the proper form.
- Pilates exercises engage multiple body regions, so you can work a muscle group again in a different exercise, reducing the need for multiple sets of one.
These exercises require no equipment, which allows them to be done anywhere.
Dispelling the "No Pain, No Gain" Myth
Lastly, it’s time to throw out the “pain is weakness leaving the body” t-shirts and move into a better mindset. A good exercise regimen should never cause pain that leaves you hurting and limping long after it’s over. Steer clear of that kind of exercise.
Beneficial exercise can leave your muscles feeling shaky, tired, and rubbery. Those are signs that you have pushed them to their limits – a sensation of discomfort, but not pain.
A few guidelines for recovery:
- Challenging, intense workouts are fine once or twice a week, provided you have recovery days in between.
- Muscle soreness (known as Delayed Onset Muscle Soreness or DOMS) is normal and typically peaks 24–72 hours after a workout. This can take 3-10 days to fully resolve.
- Avoid hard, muscle-fatiguing exercise on back-to-back days. For riding, don’t follow up a high-intensity strengthening day with a very long, intense, or high-elevation-gain bike ride the same day or the next. Your muscles need time to repair and heal stronger.
- High-intensity workout is defined as an activity where you cannot carry on a conversation, or anything over a 5 out of 10 on the Modified Borg scale.
The Five Pilates-Based Exercises for Mountain Bikers
Without further ado, here are the five Pilates-based exercises for mountain bikers:
Pelvic Press (AKA Bridge)
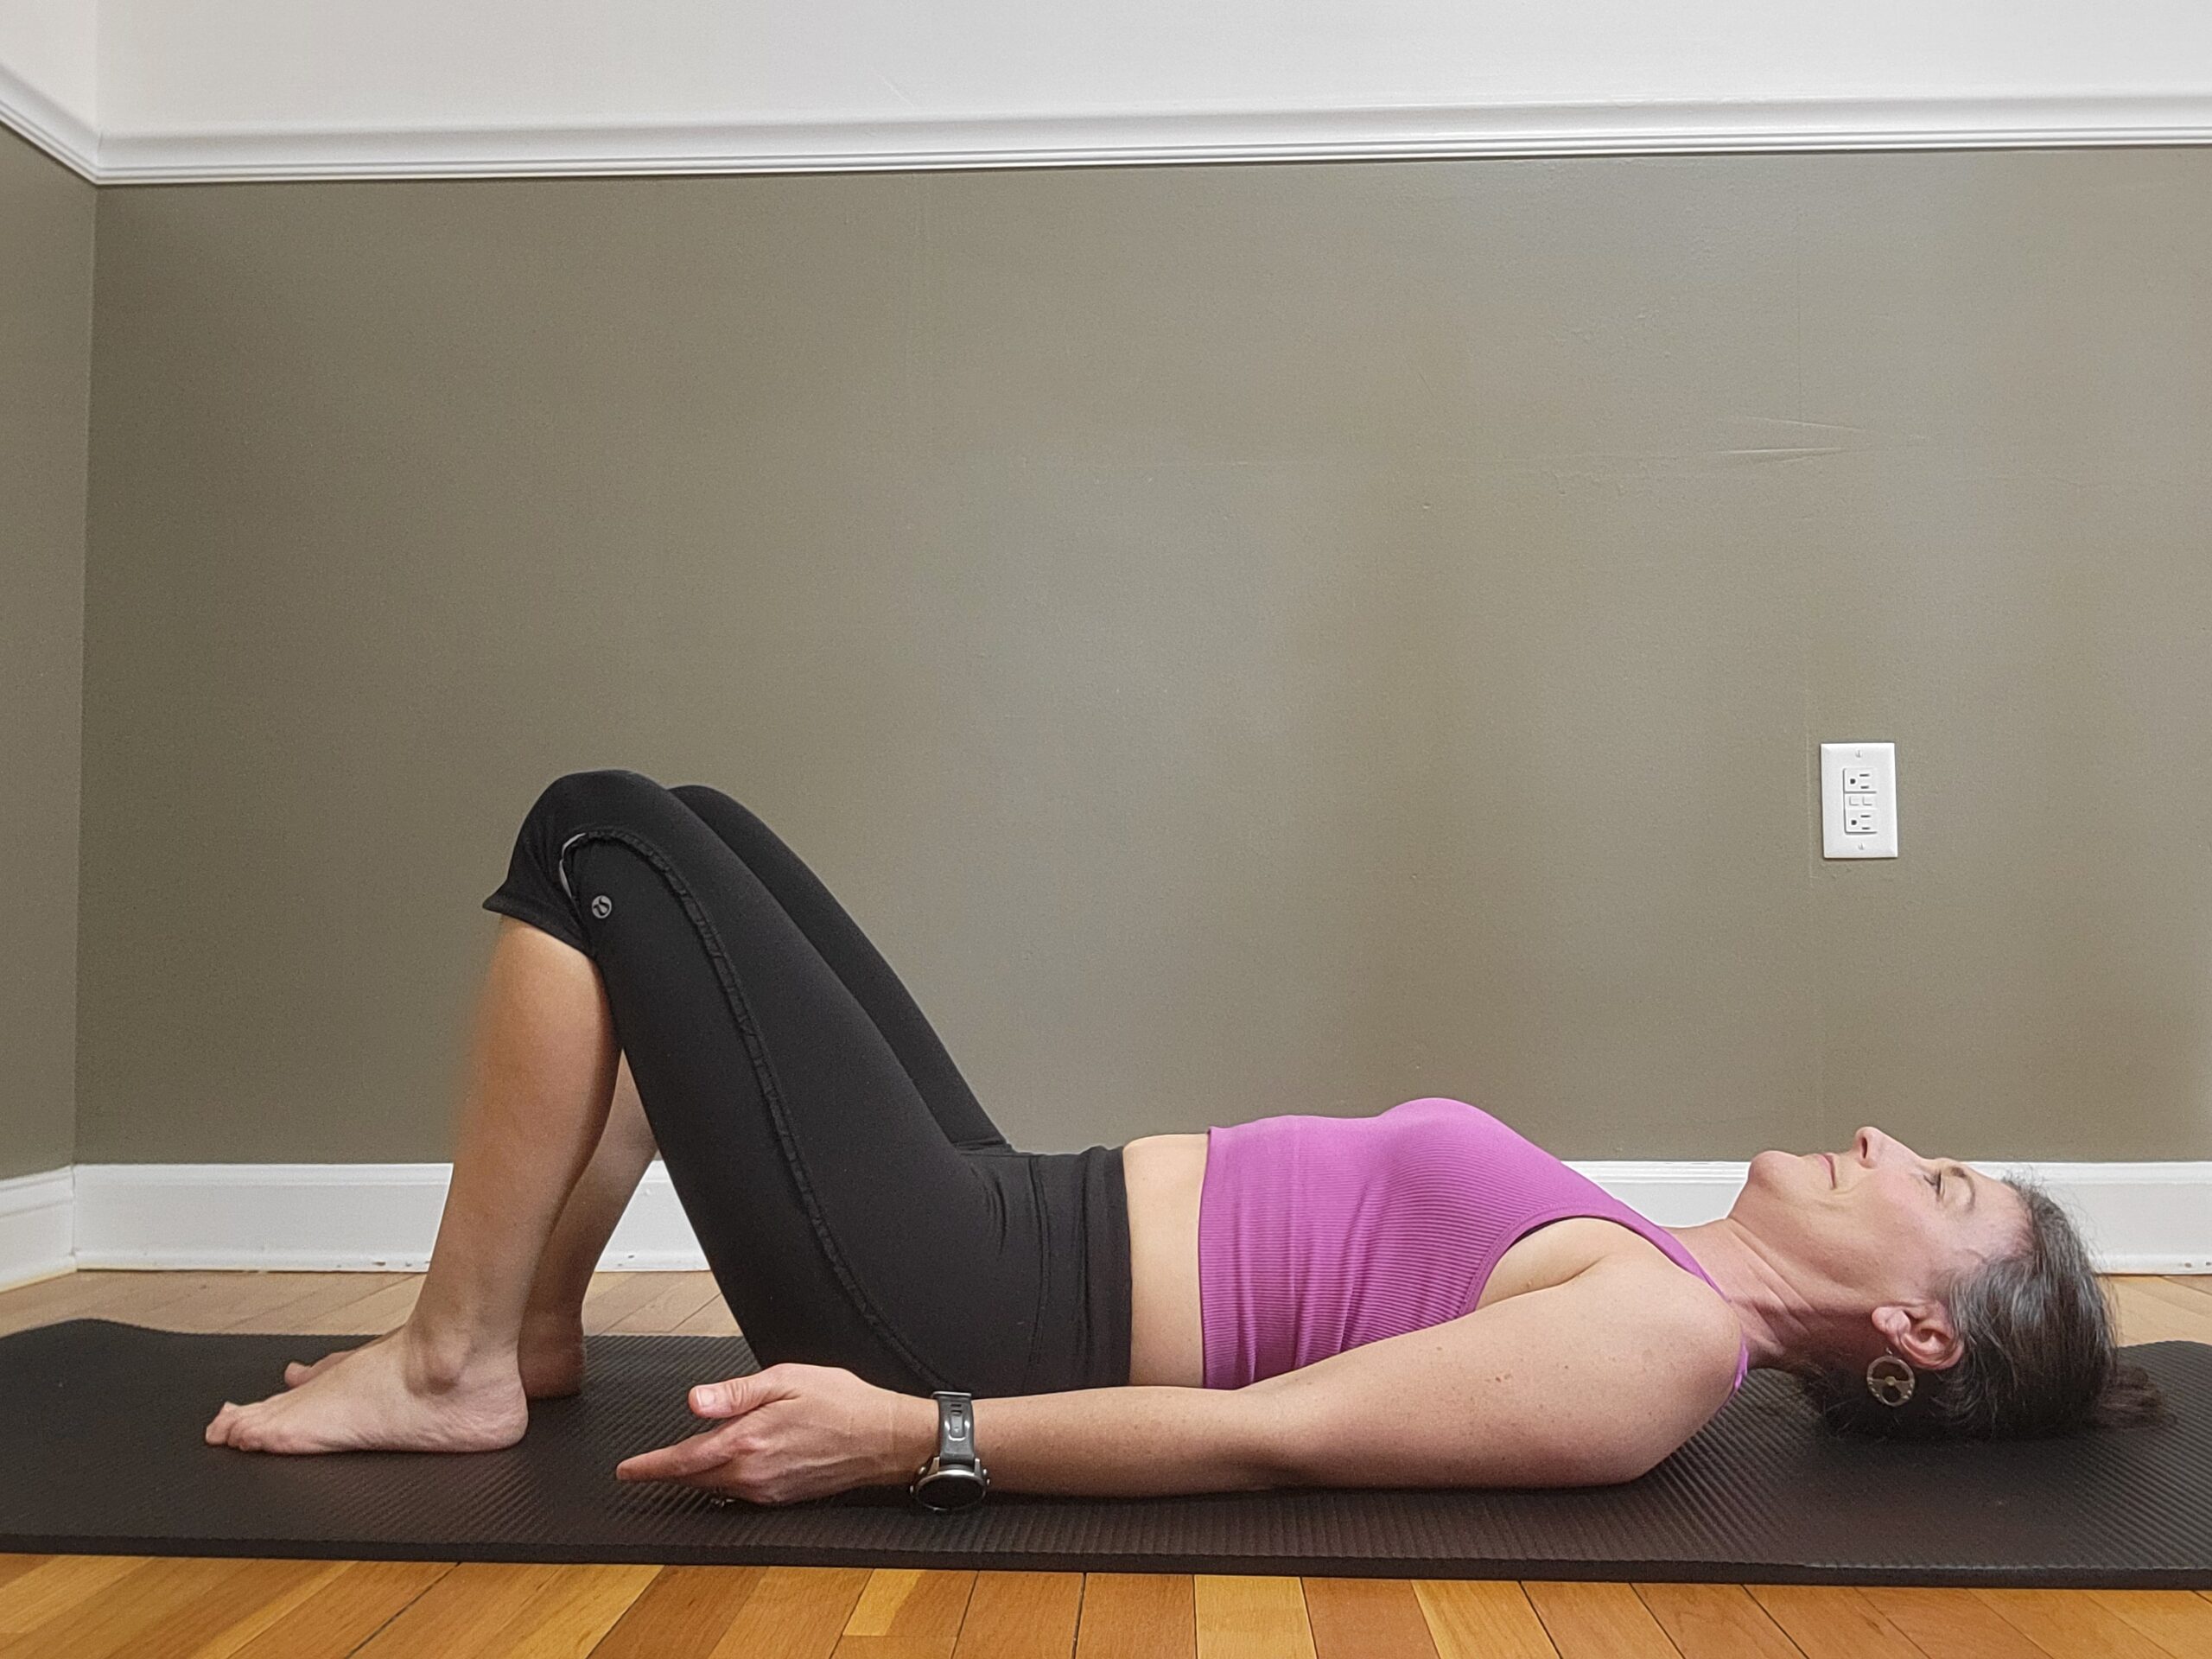
Setup:
- Lay on your back with your feet sits bone width apart.
- Feel the ground evenly under the big toe, little toe, and heel of the feet.
- With palms facing up, gently press the back of the arms and shoulder into the ground.
- Gently tighten or contract the lower abdominal muscles as though you are cinching the bones on the front of the pelvis inward towards each other.
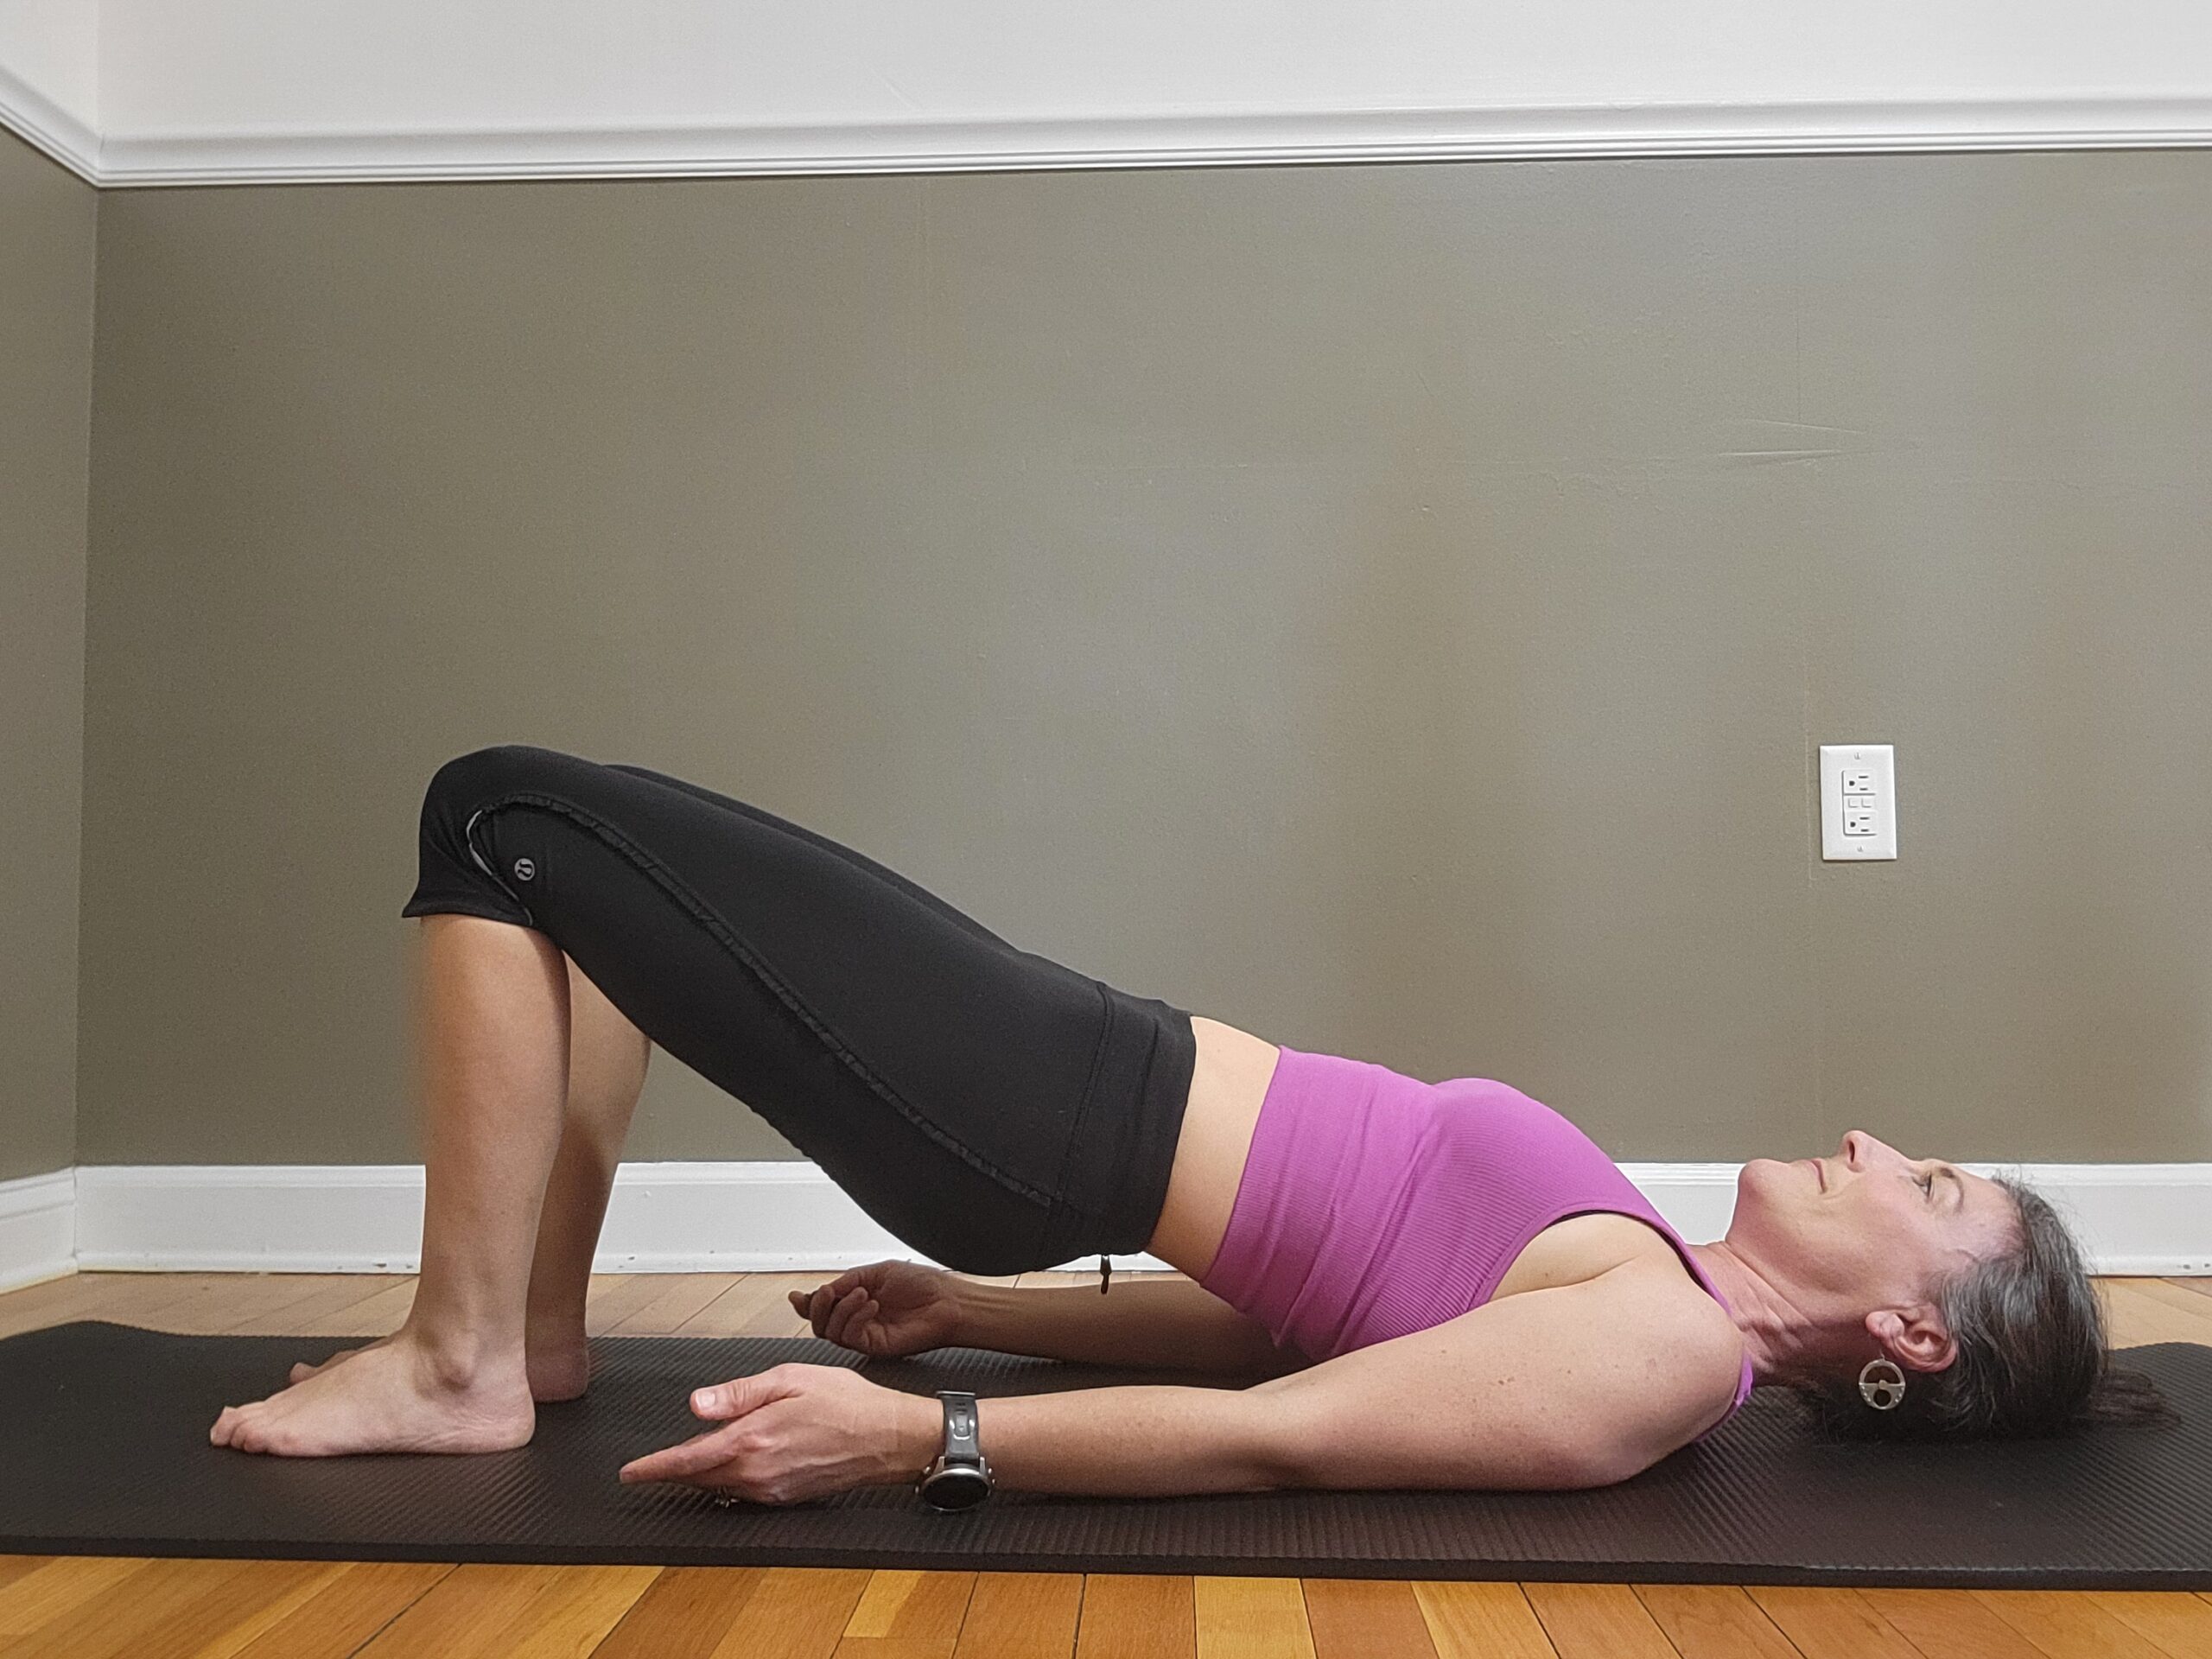
Movement (Flat Back/Pelvic Press):
- Inhale: Press through the feet as you contract your buttock muscles to lift the hips off the ground. Pause when your thighs are in line with your torso.
- Exhale: Slowly lower back down with control.
Movement (Articulated):
- Exhale: Use the abdominal muscles to roll the pelvis backward, flattening the low back, before lifting your hips up. Imagine you are lifting the spine up one vertebrae at a time.
- Inhale: Pause at the top of the lift.
- Exhale: Keep the hips lifted while lowering the ribs first, placing the spine back down to the floor one spine segment at a time until the tailbone and hips touch down last.
Key Concepts |
Maintain equal pressure under all parts of the feet. Use a gentle lower abdominal contraction to stabilize the low back. Use the legs to lift the pelvis, not the back. |
Purpose |
Strengthening hamstring and gluteal (buttock) muscles, training core stabilization, and promoting spinal mobility (for the articulated version). |
Amount |
5–10 repetitions each version; 1 set each exercise |
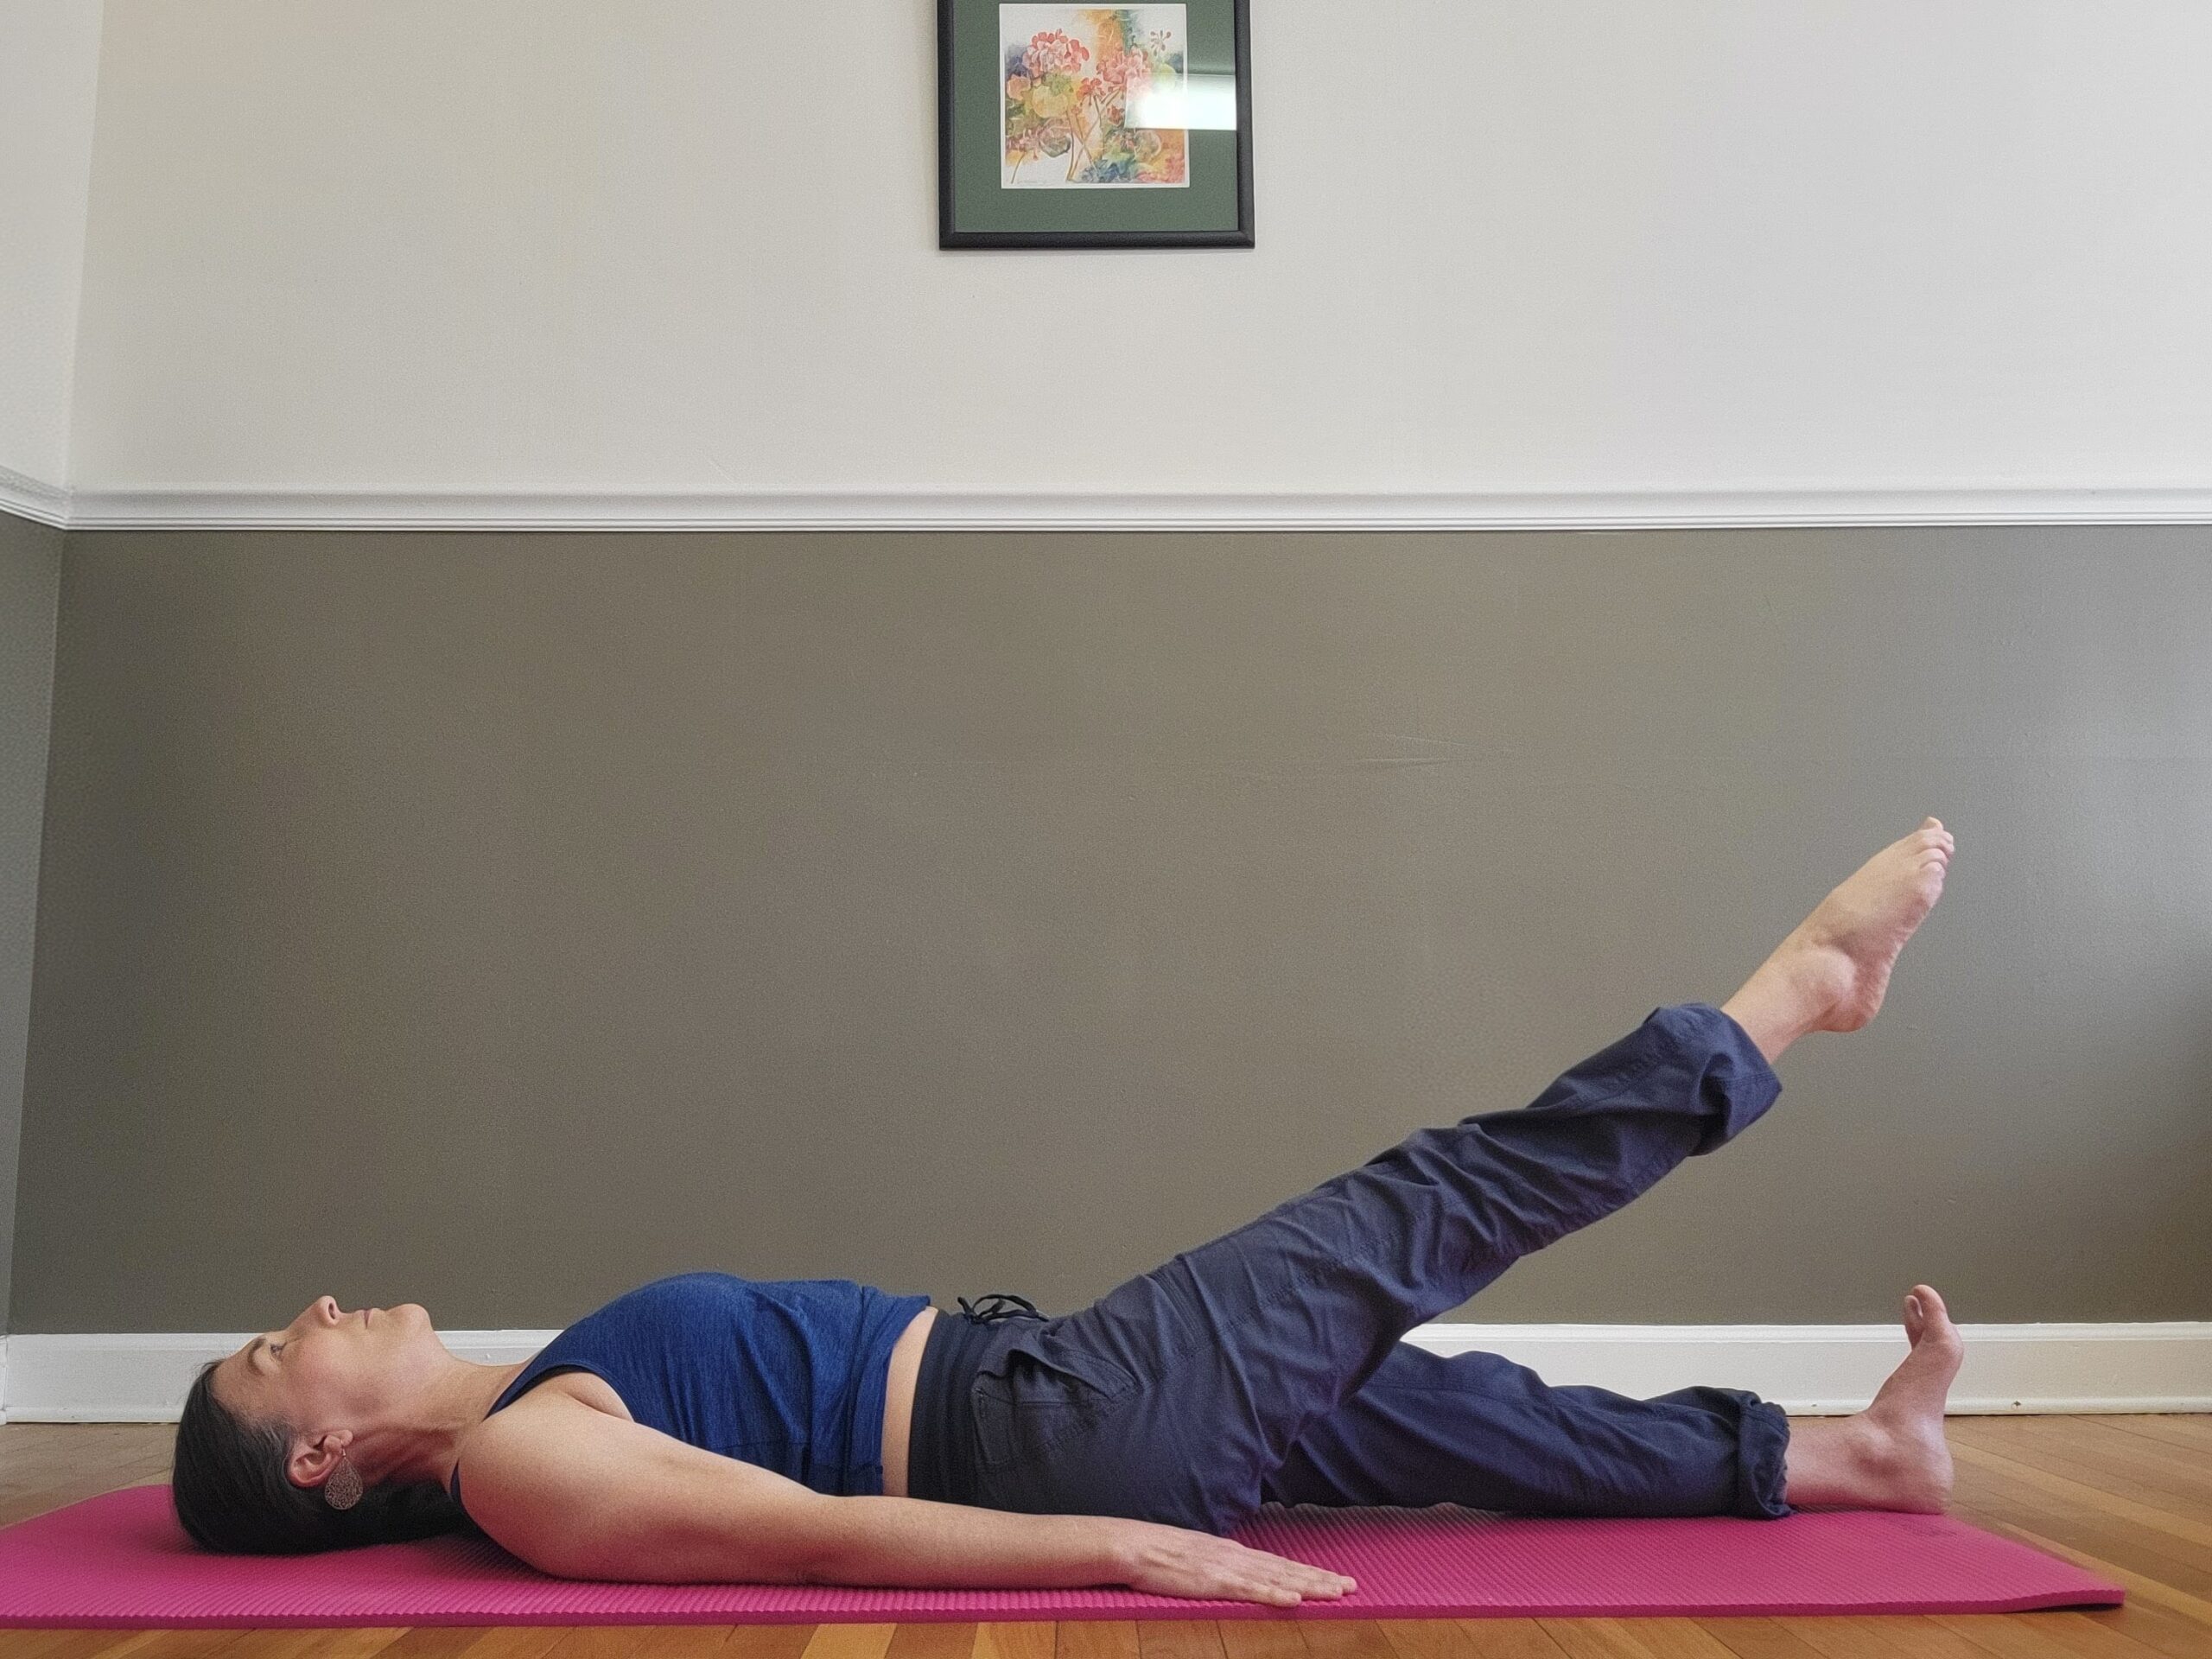
Supine Leg Series
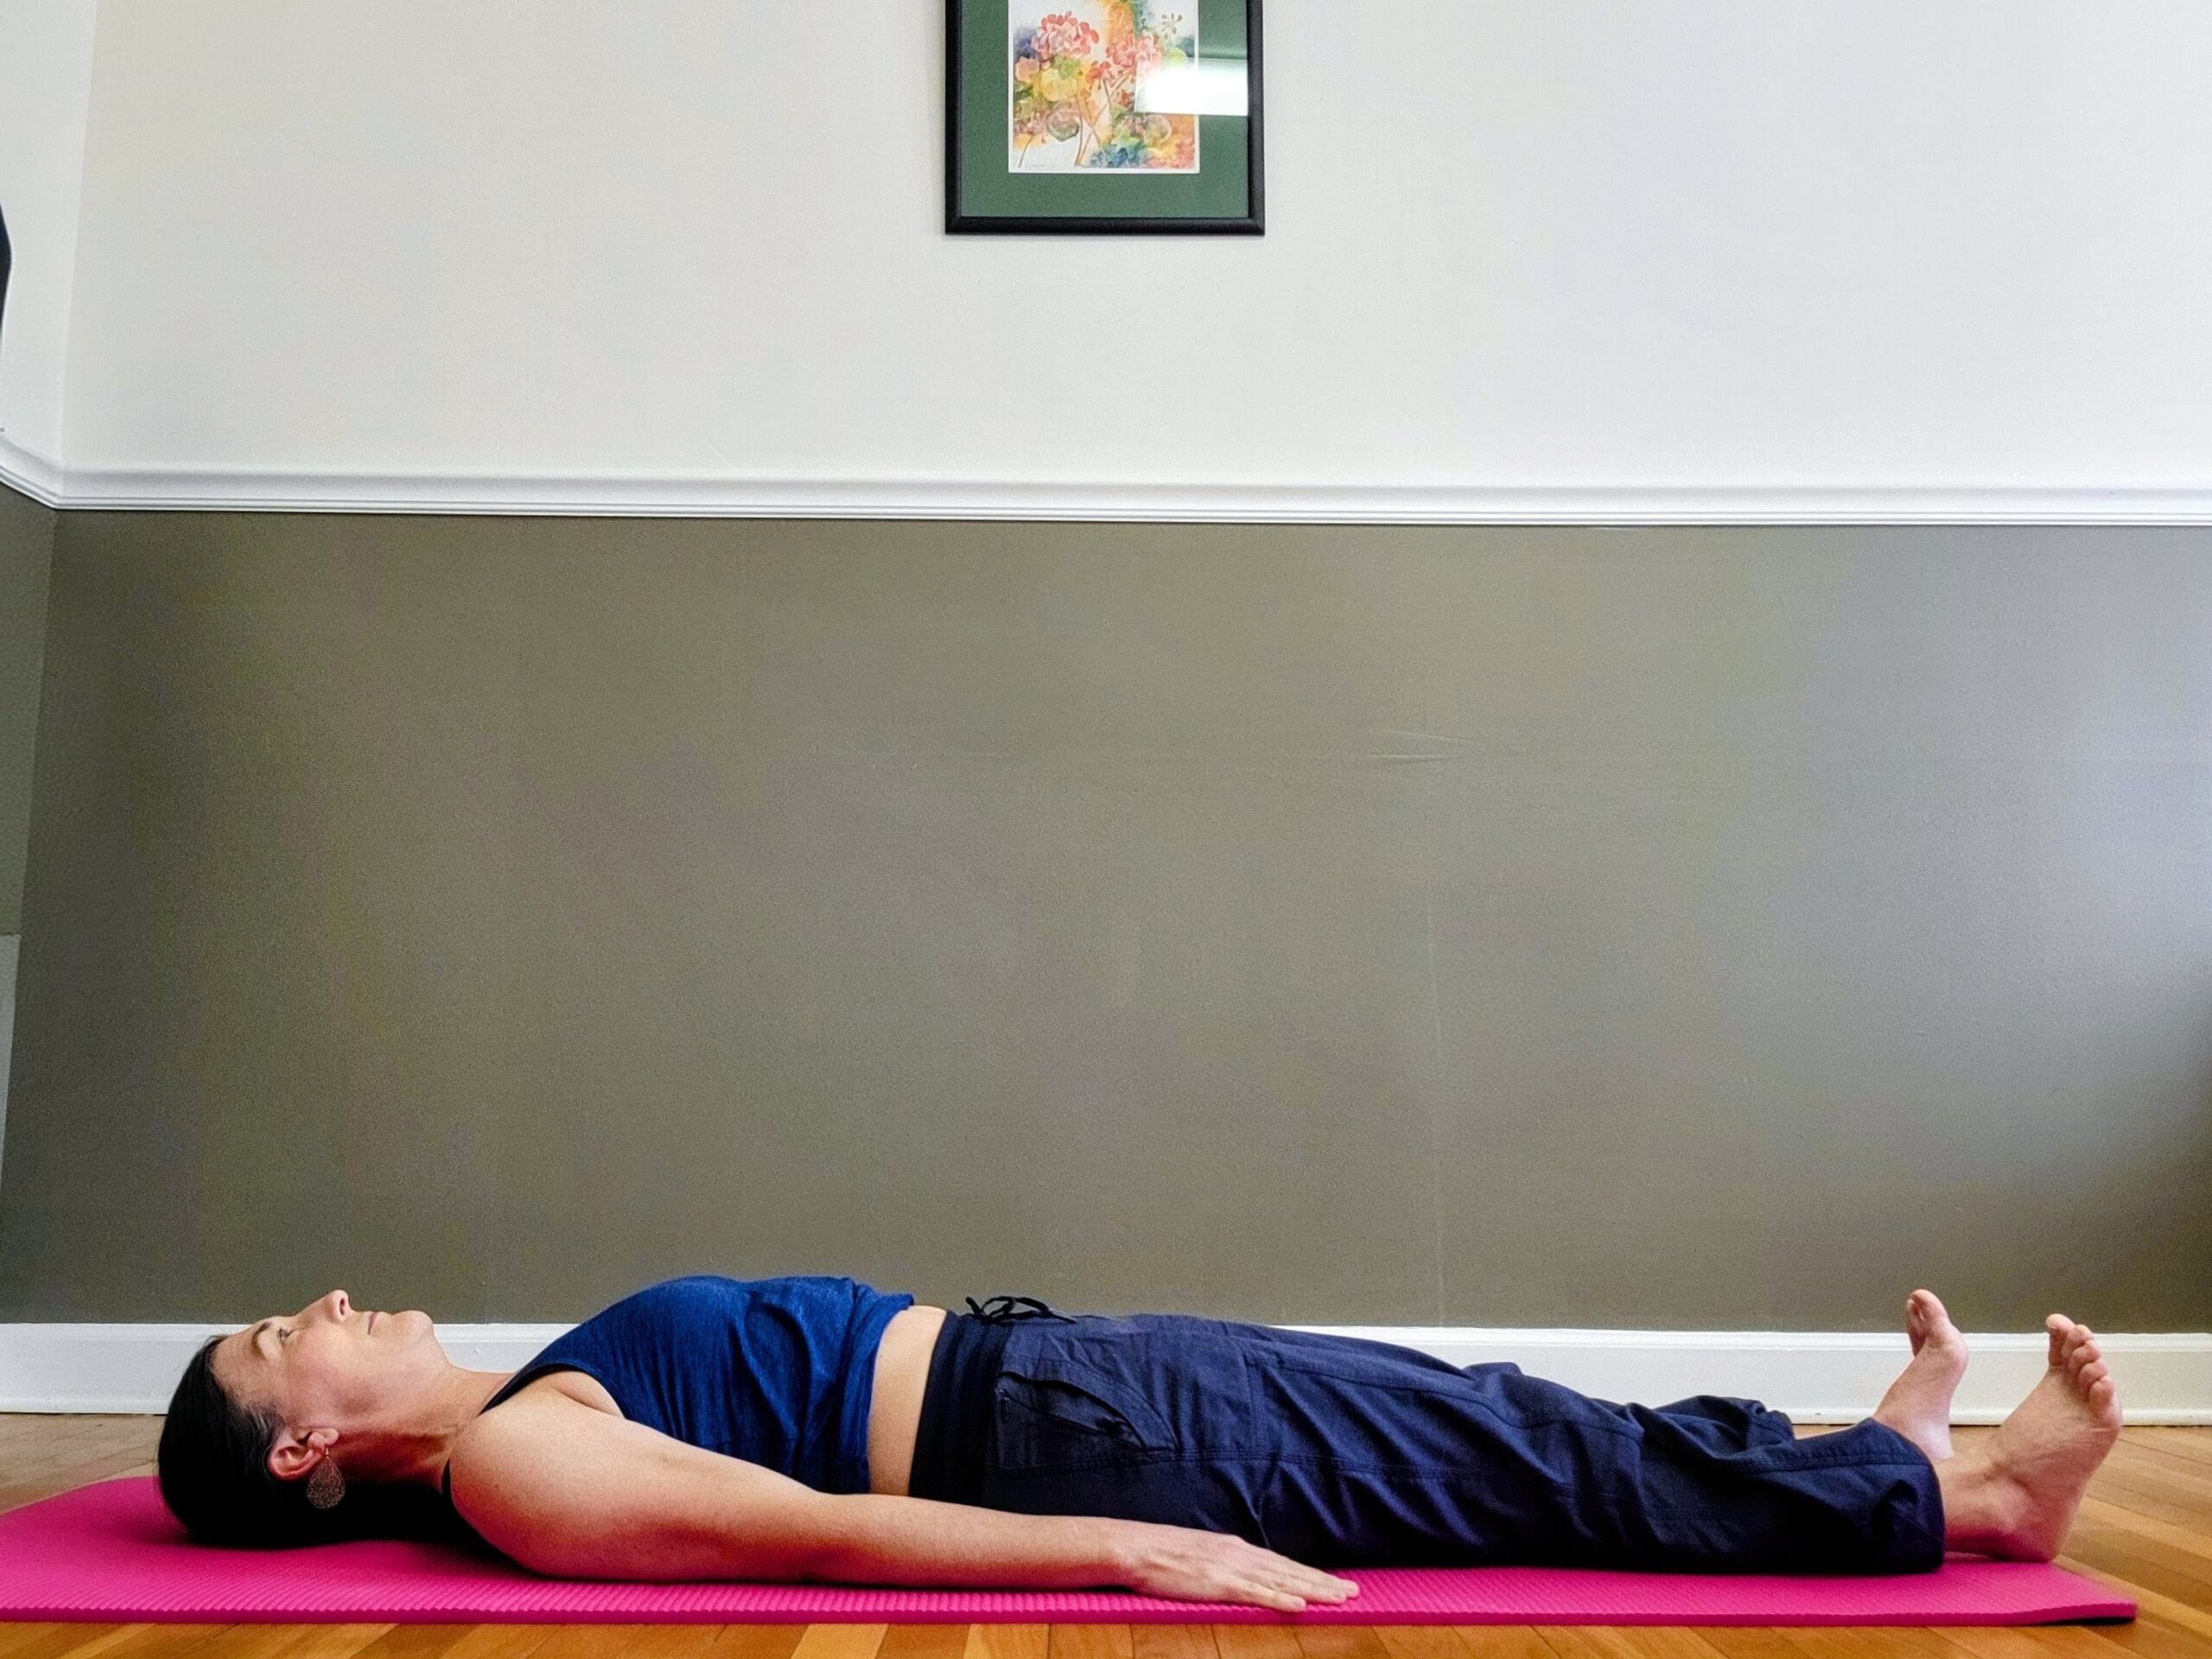

Setup:
- Lay on your back, legs straight, arms by your side (palms down).
- Gently press the back of your shoulders and palms into the ground.
- Anchor the back of your left leg into the ground and gently contract your lower abdominal muscles.
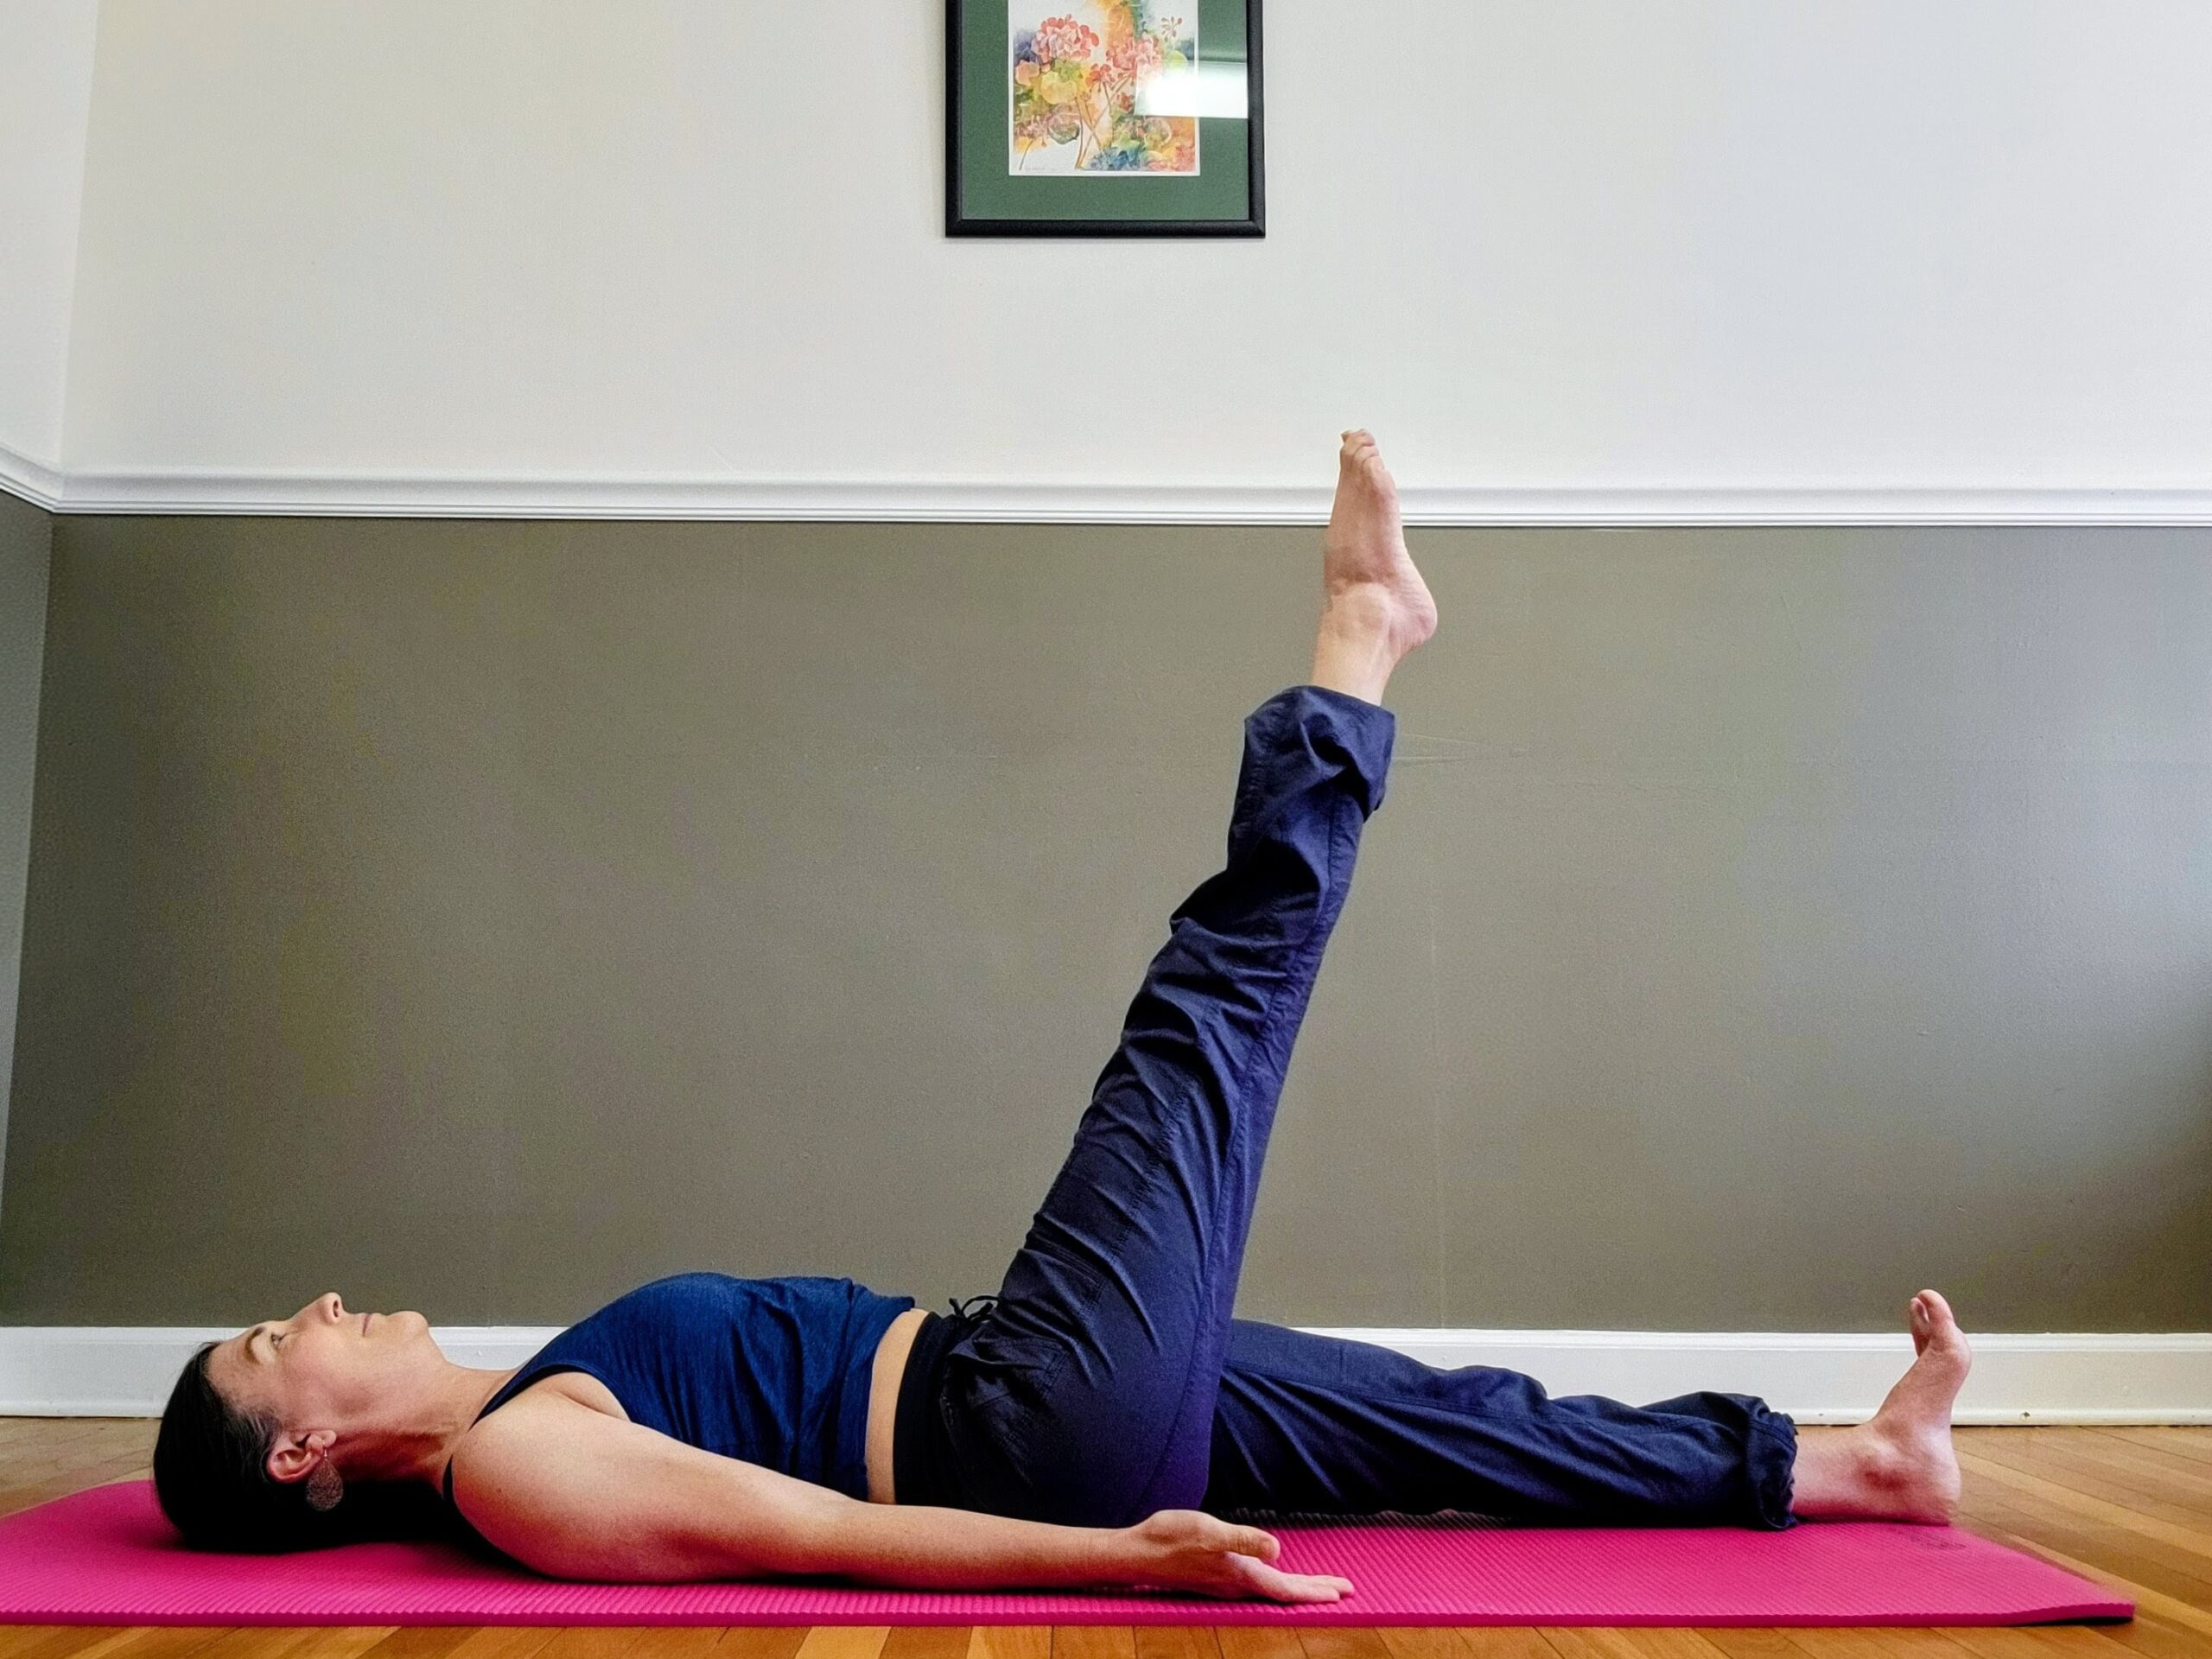
Leg Lifts:
- Inhale: Lift the right leg toward the ceiling until you feel a stretch along the back of the leg.
- Exhale: Lower the leg back down, but only as far as you can without arching your low back.
- Repeat the lifting and lowering on the same leg, then switch sides.
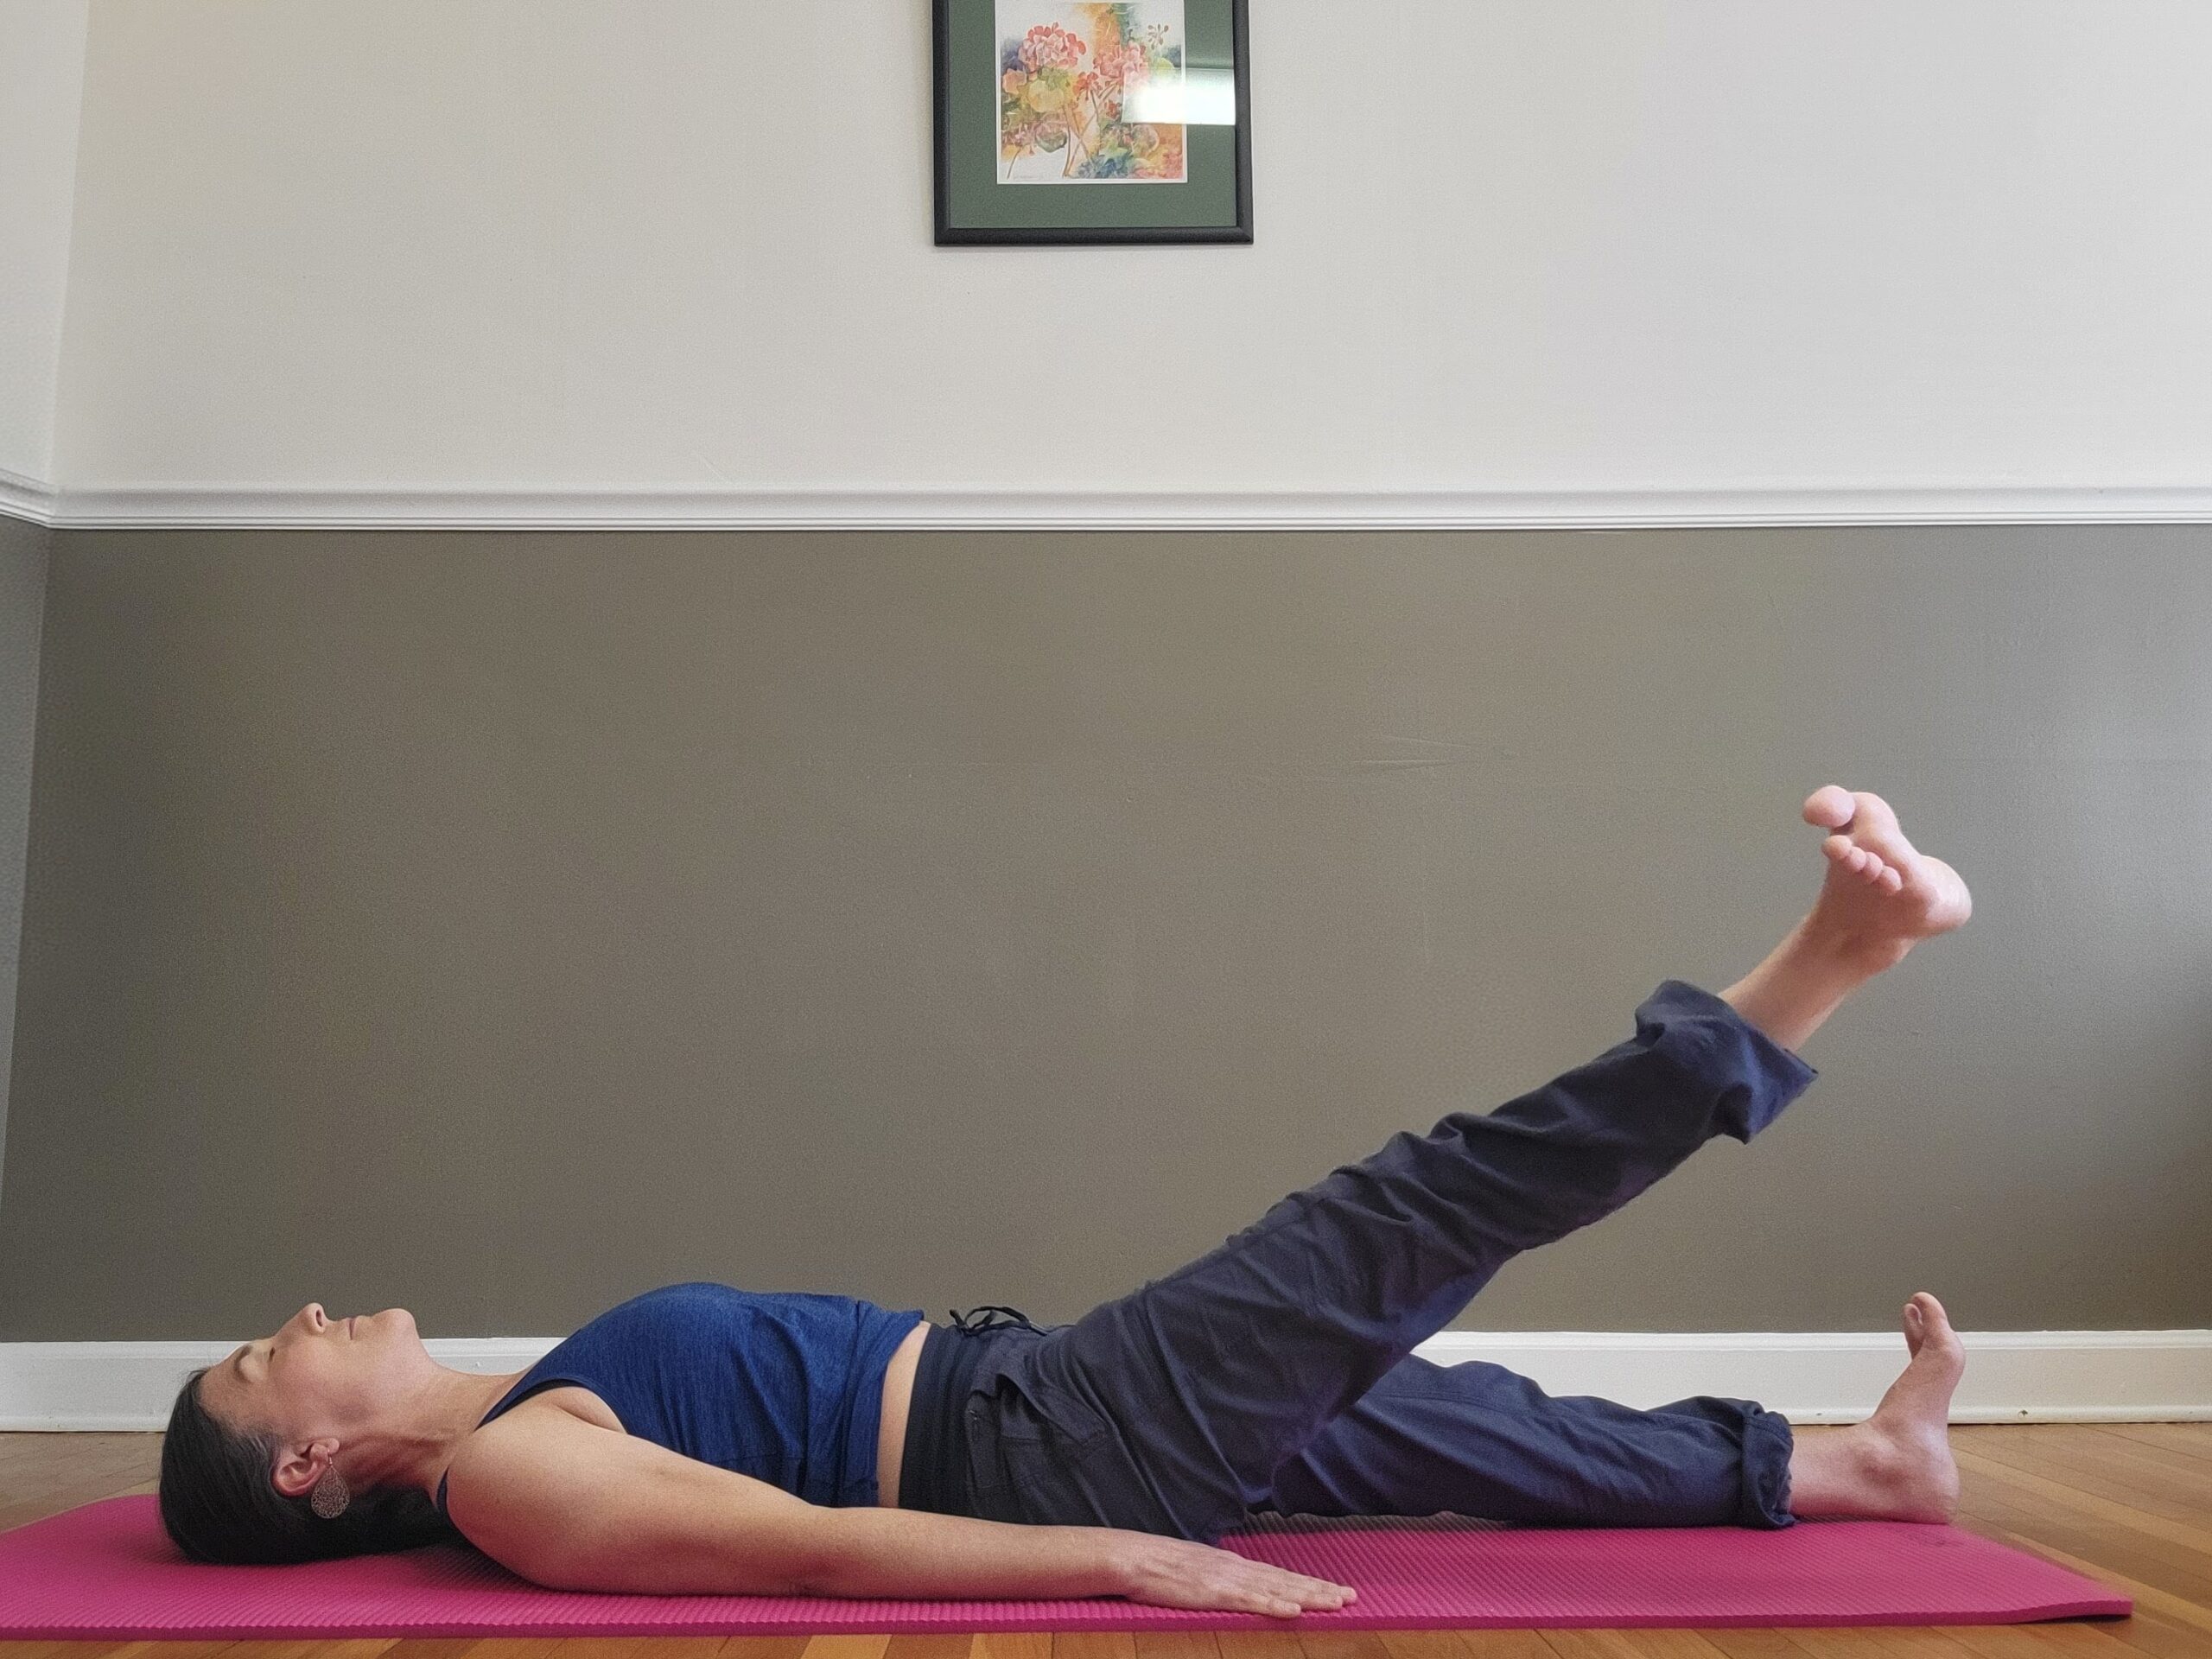
Leg Circles:
- Start with the leg lifted (same as for lifts).
- Exhale: Move the leg out to the side and downward.
- Inhale: Lift the leg up in line with the body again.
- After 3-5 repetitions, reverse the direction.
Key Concepts |
Keep the pelvis and low back still. Maintain gentle tension in lower abdominals. Keep the thigh neutral or slightly rotated outward (knee cap pointed vertical or slightly away from the body). DO NOT let it rotate inward. |
Purpose |
Strengthening hip muscles, training core and shoulder stabilization, and core strengthening. |
Amount |
6–10 repetitions each leg; 1 set each for lifts and circles (both clockwise and counterclockwise). |
Sidelying Leg Series
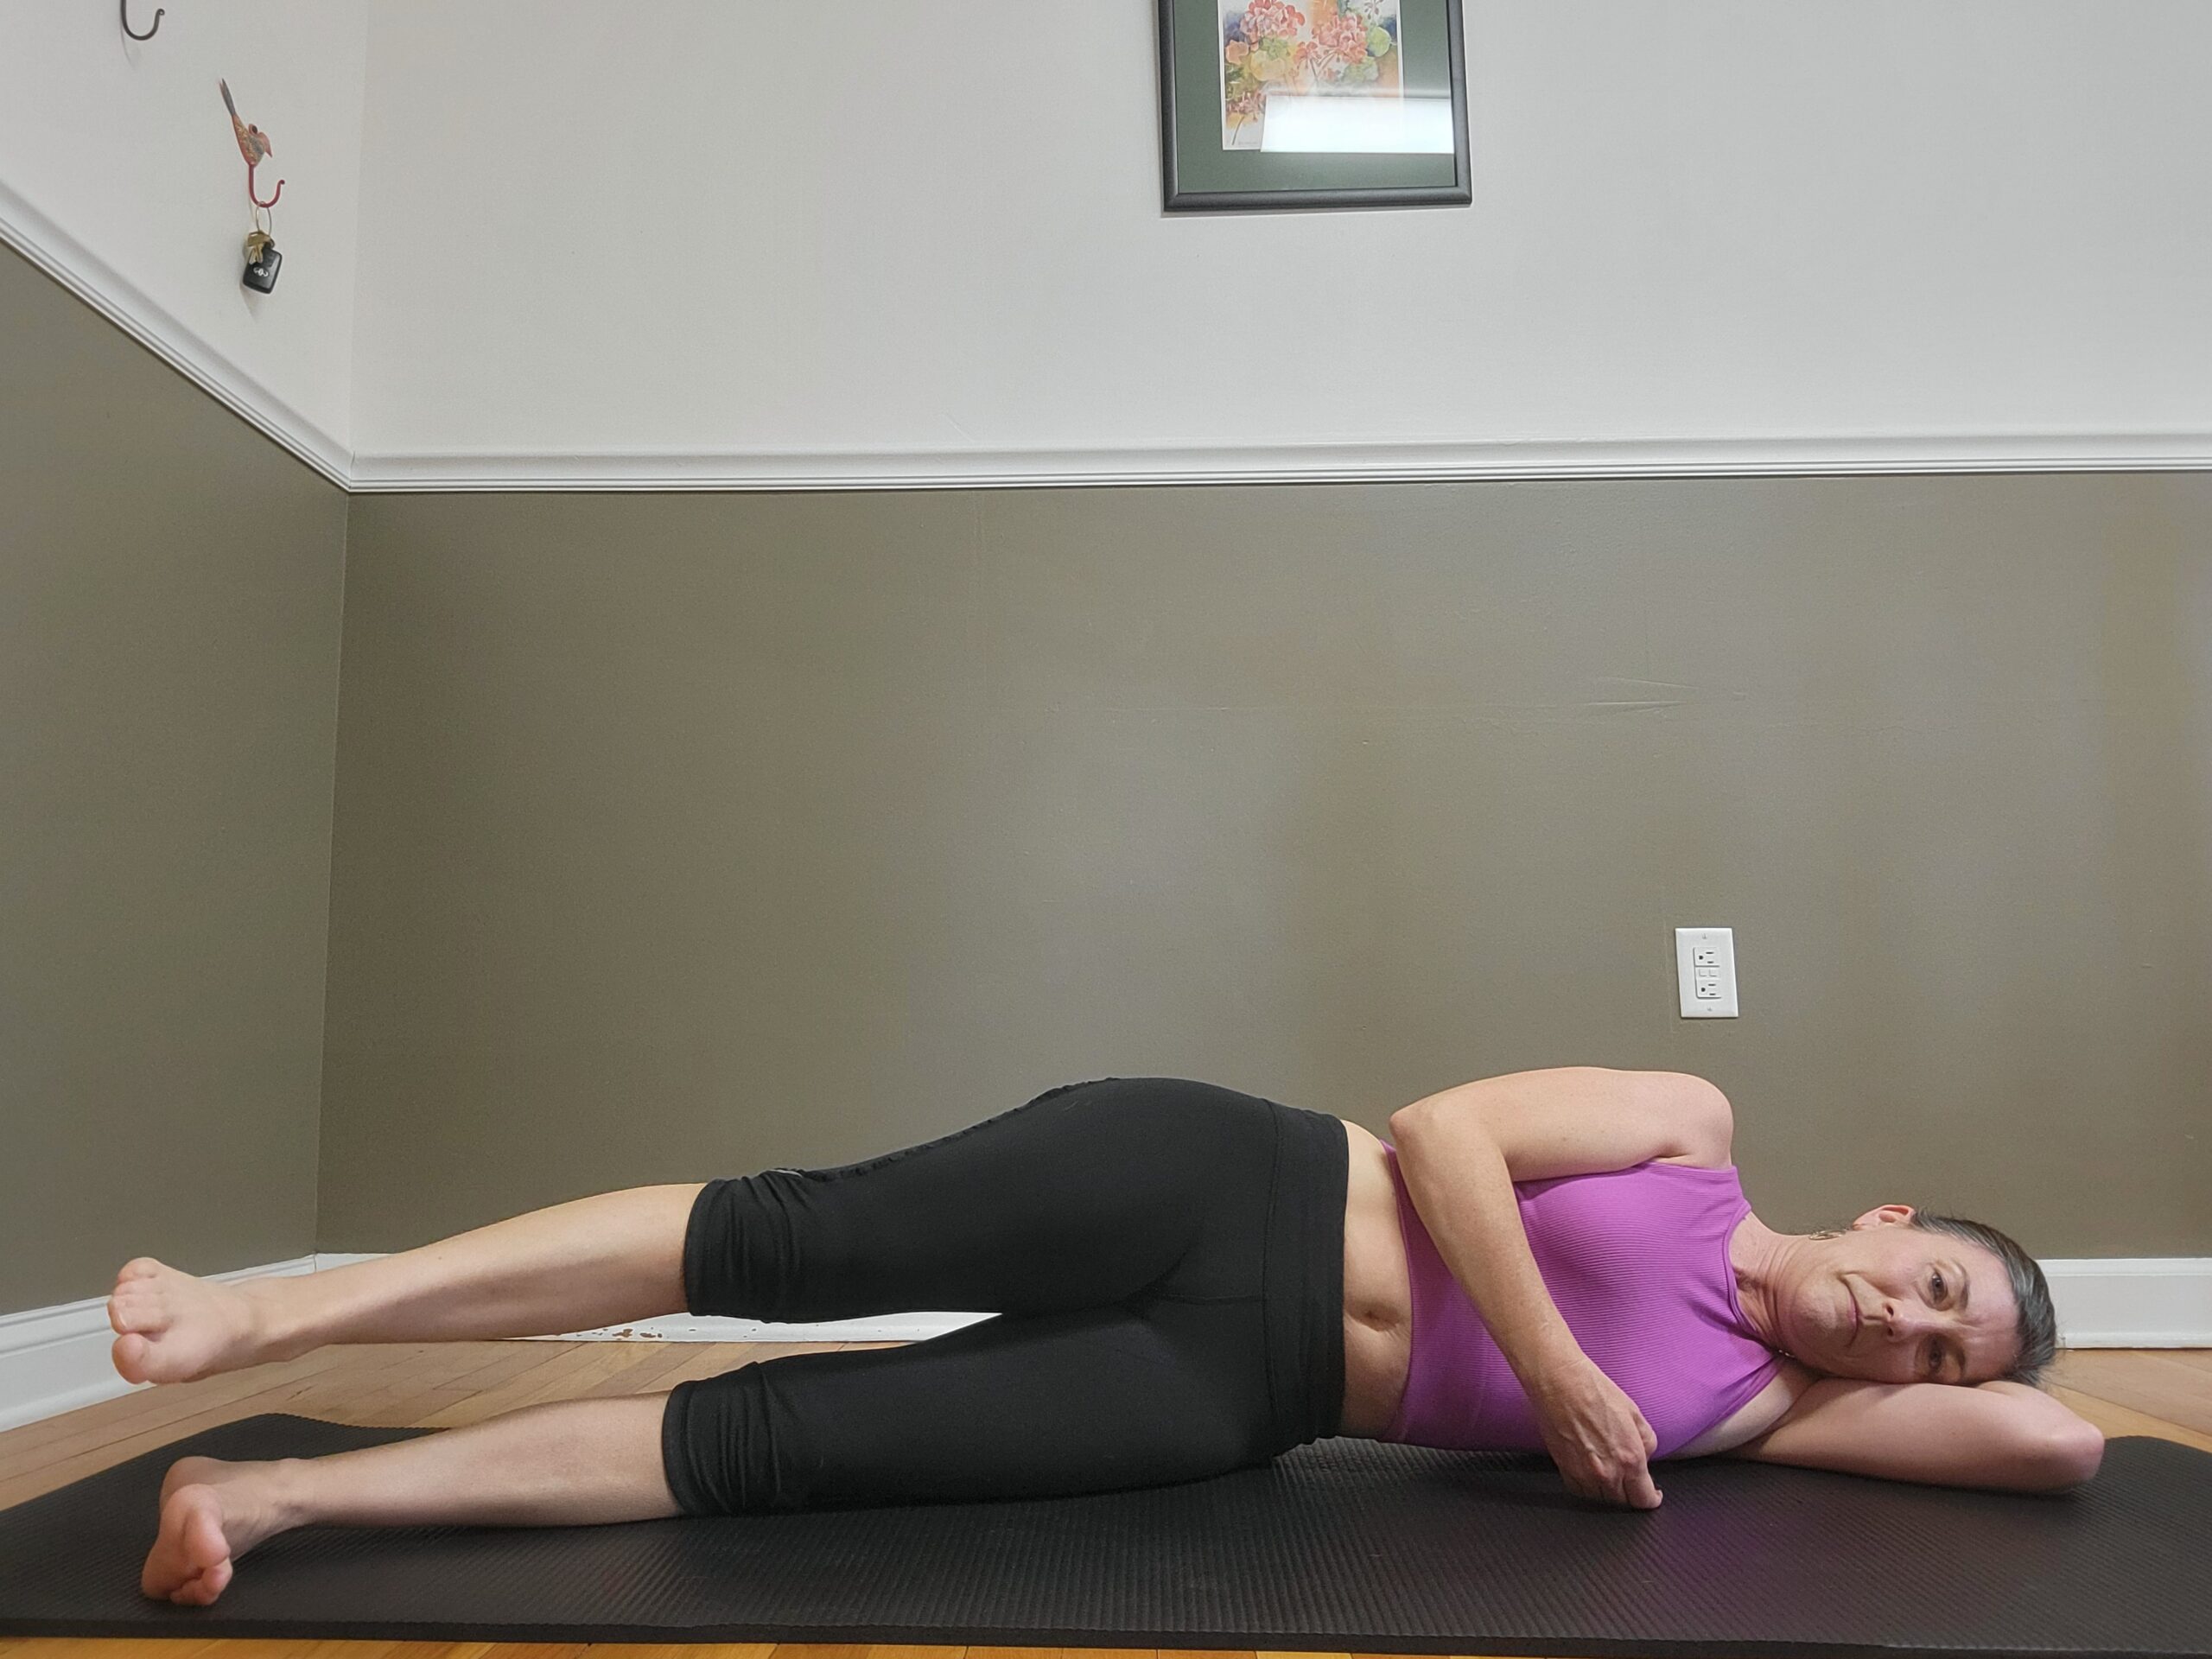
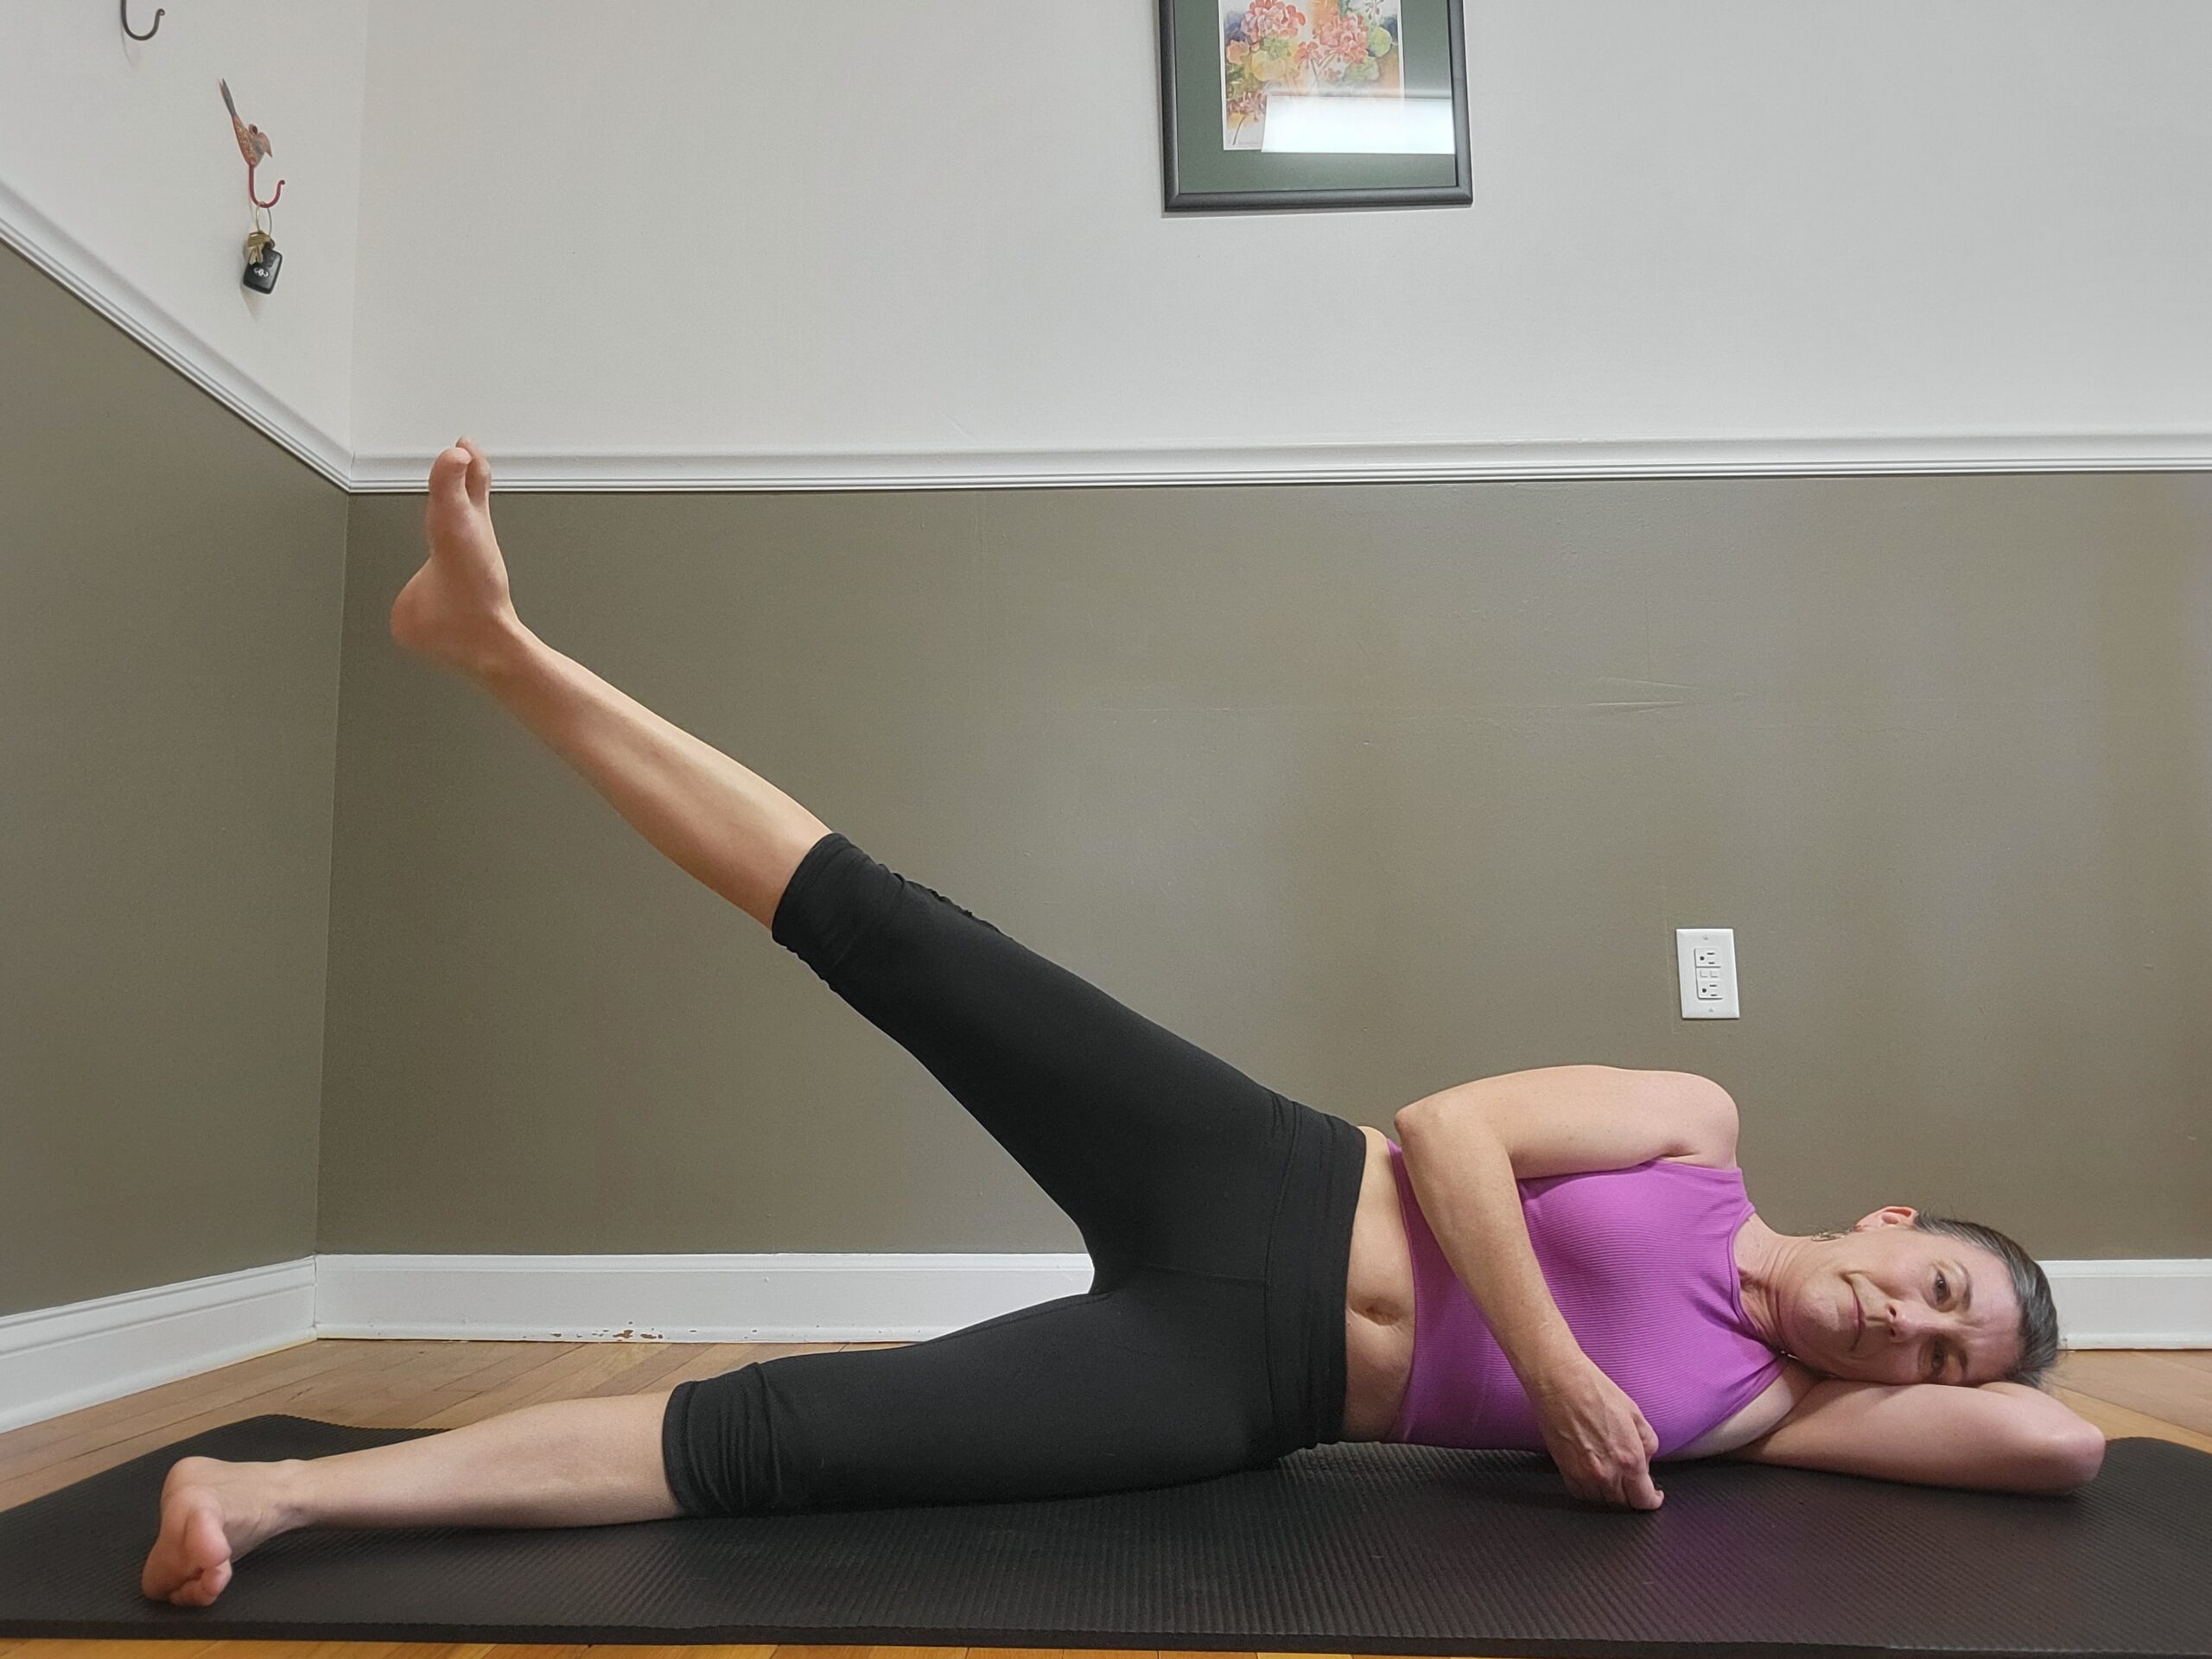
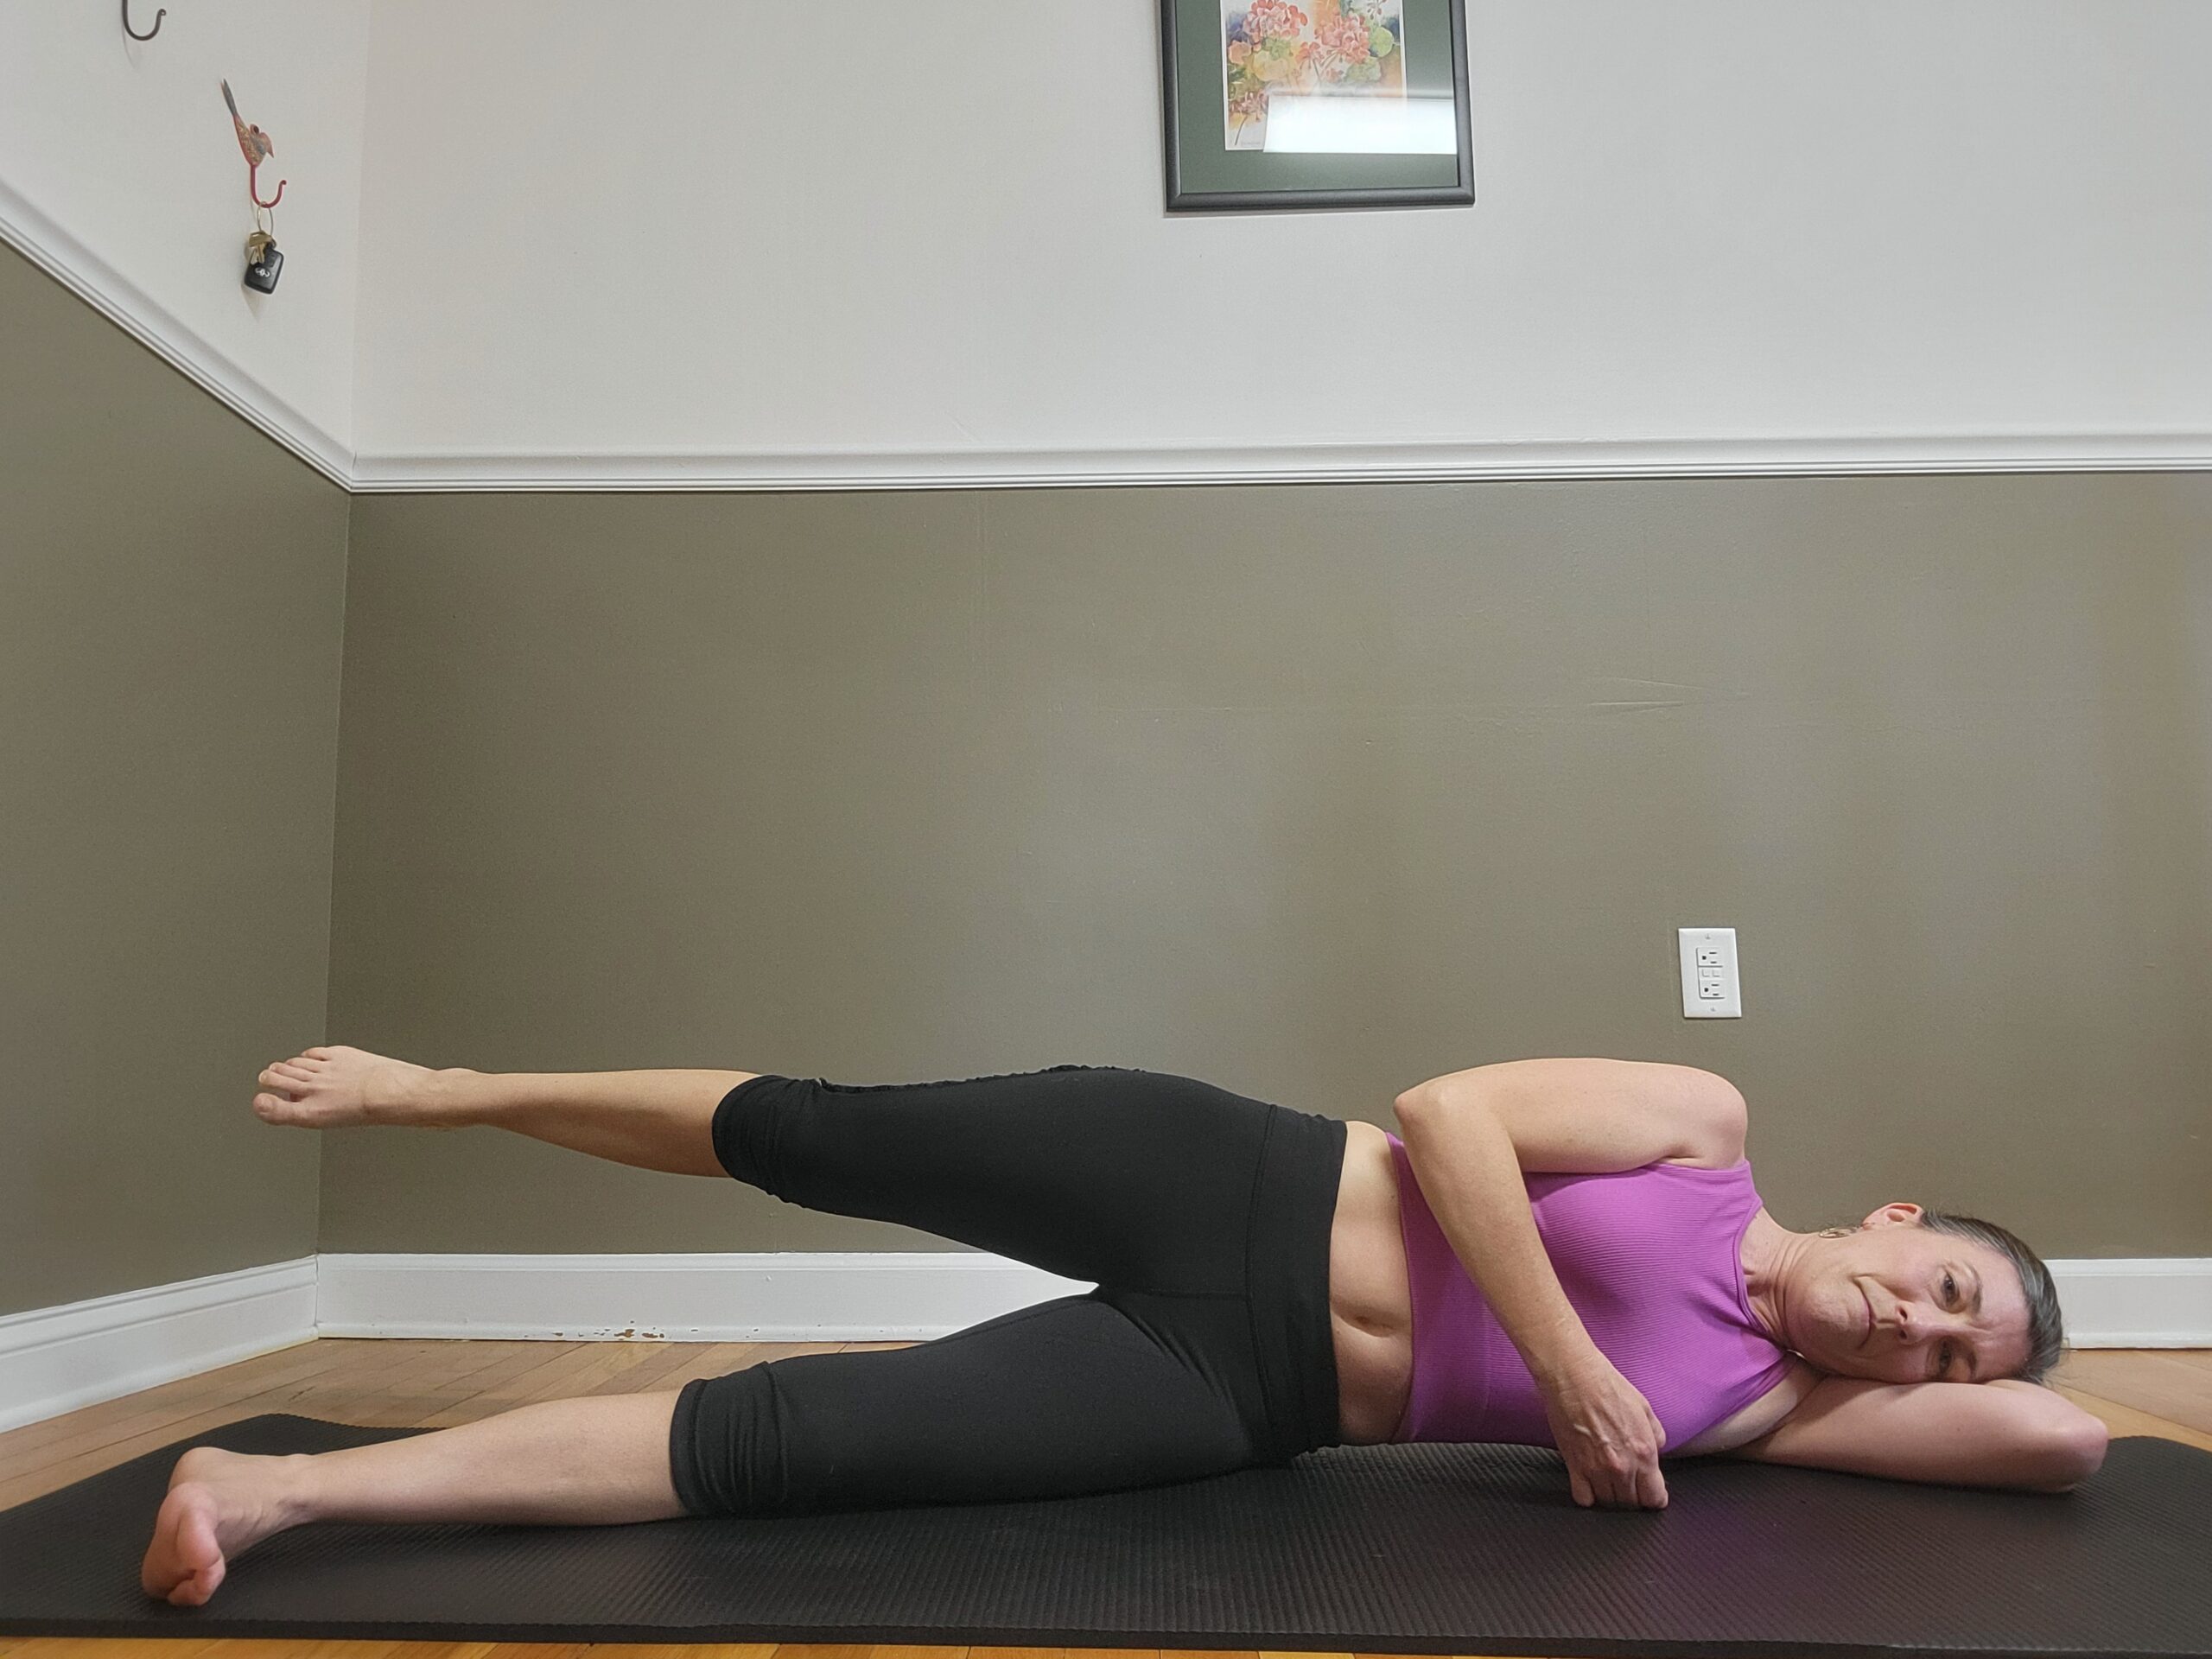
Setup:
- Lay on your side with legs slightly piked in front of your body.
- Lengthen your top hip/pelvis down to create space under your ribs (straightening the spine).
- Gently tense your lower abdominals.
- Rotate your top thigh/knee slightly outward without rolling the pelvis back.
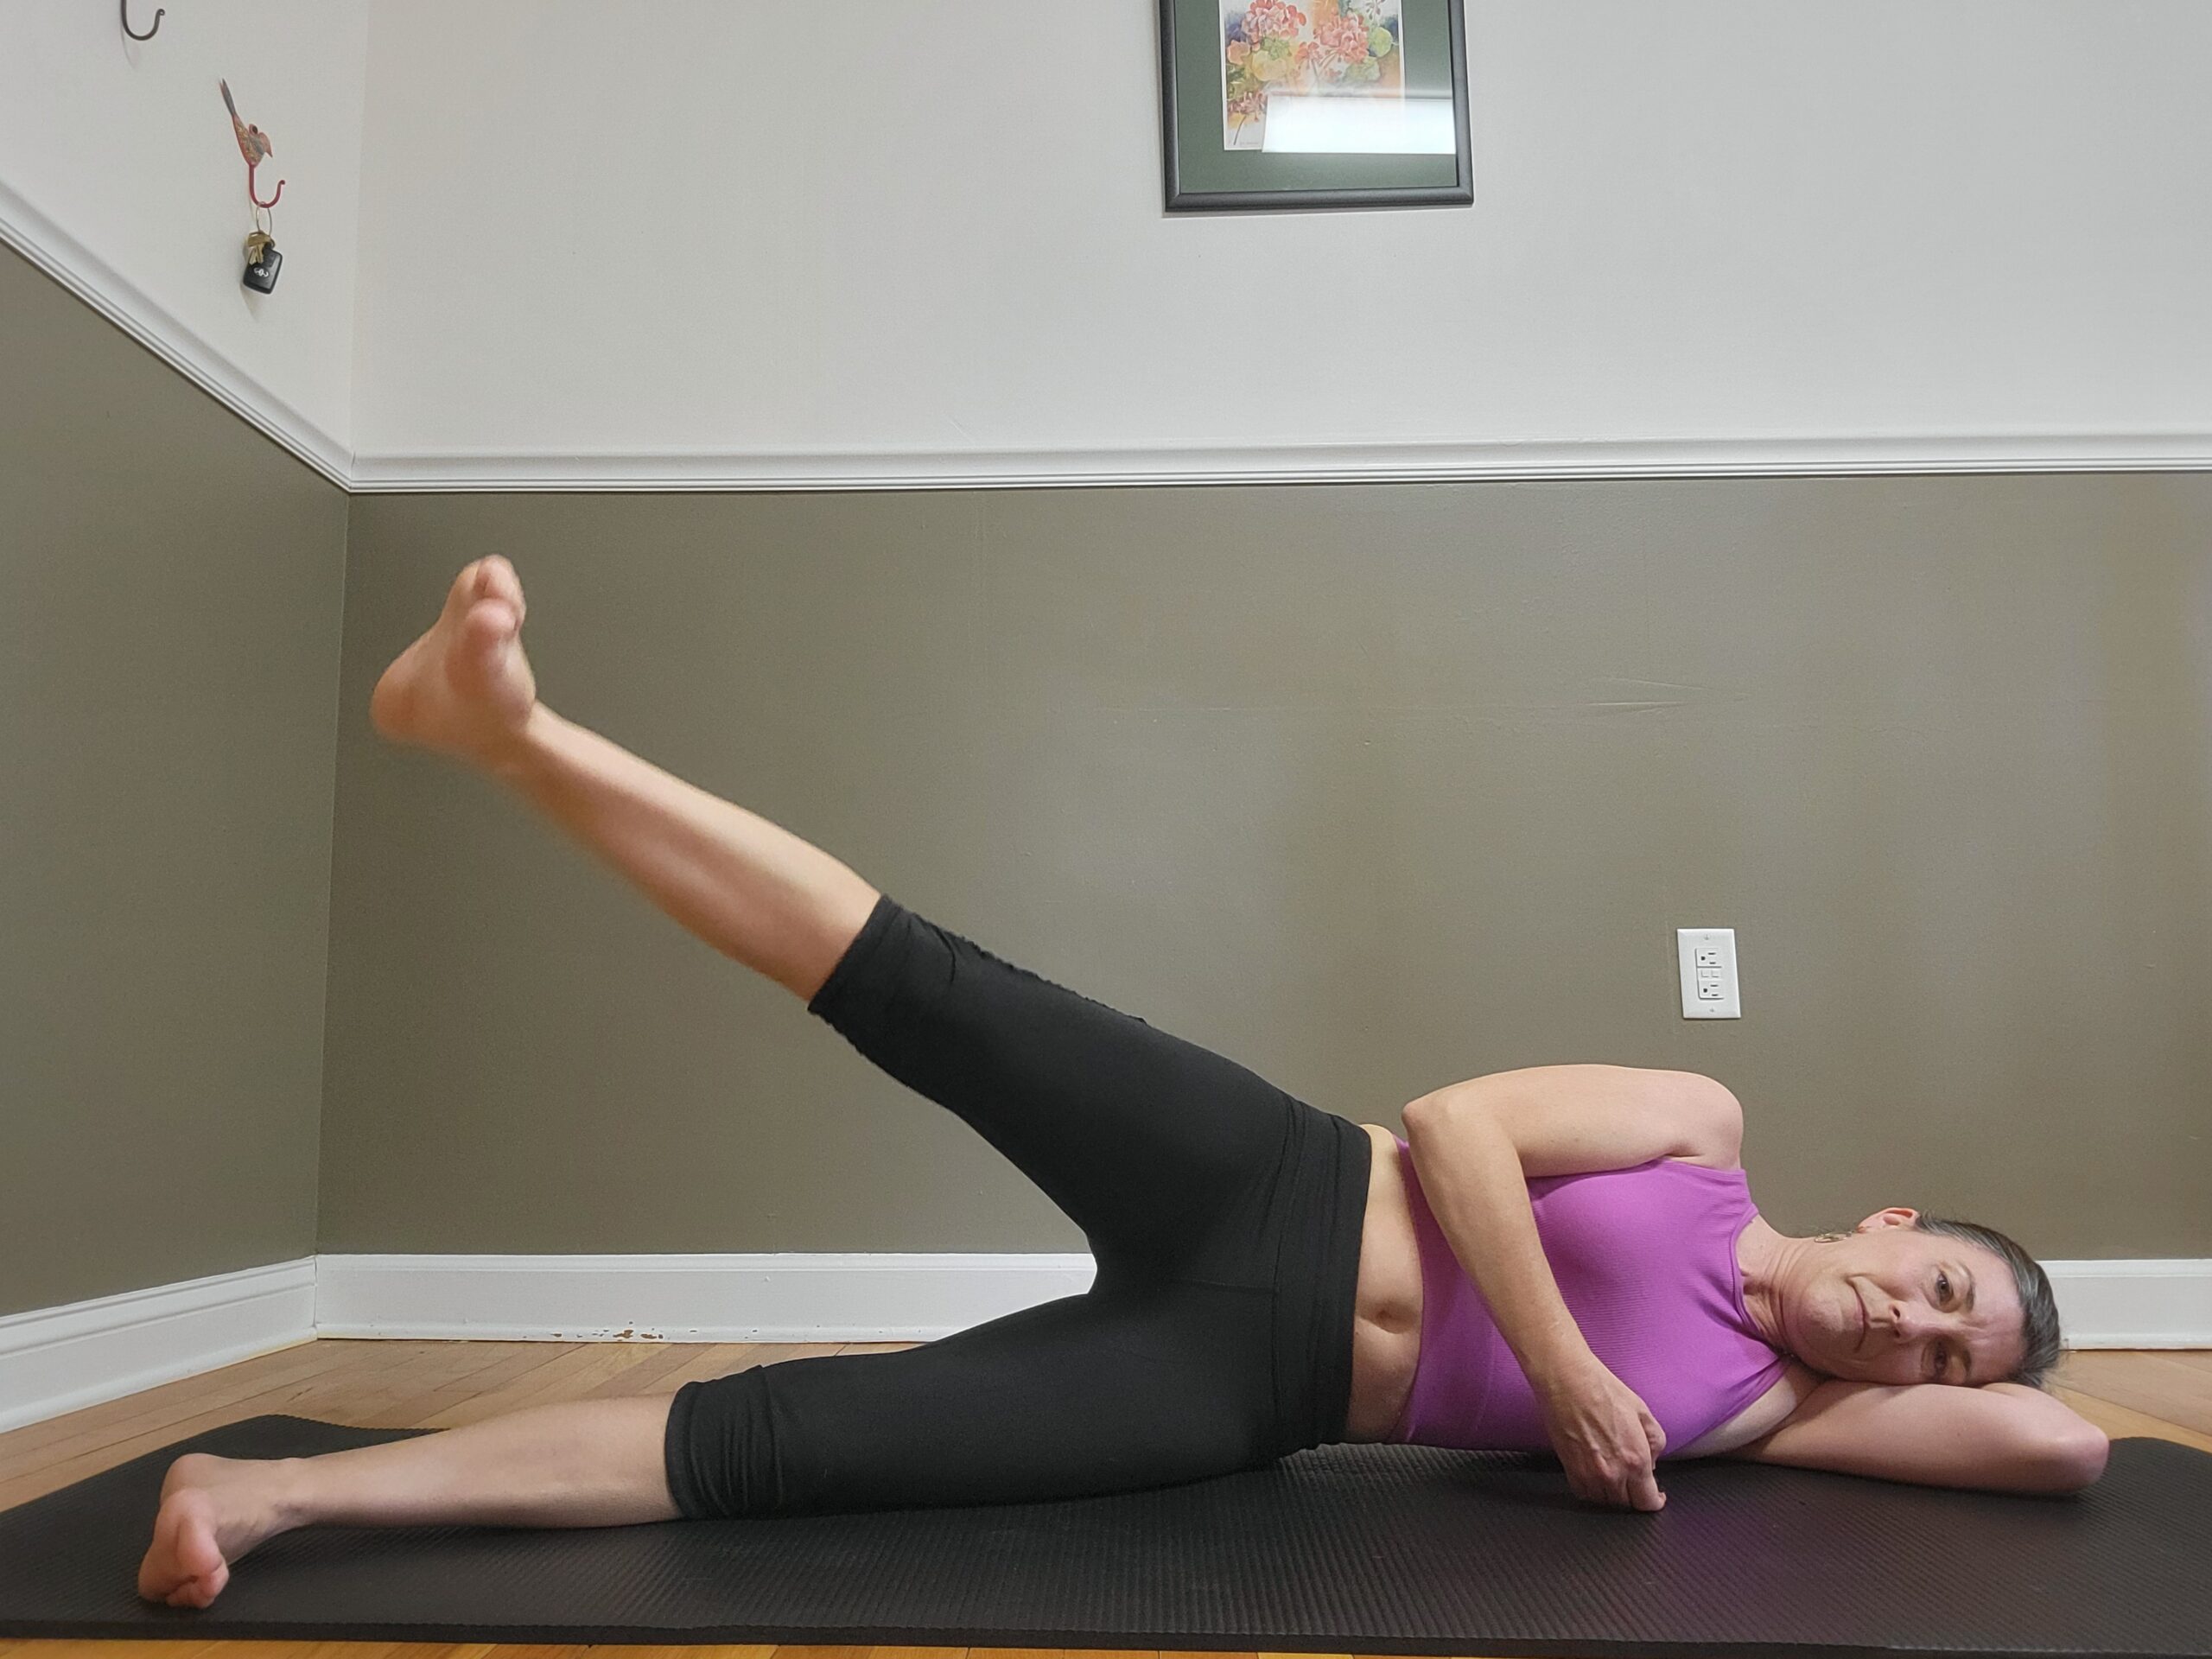
Leg Lifts:
- Inhale: Lift the leg up.
- Exhale: Lower the leg down until it is in line with the hip joint.
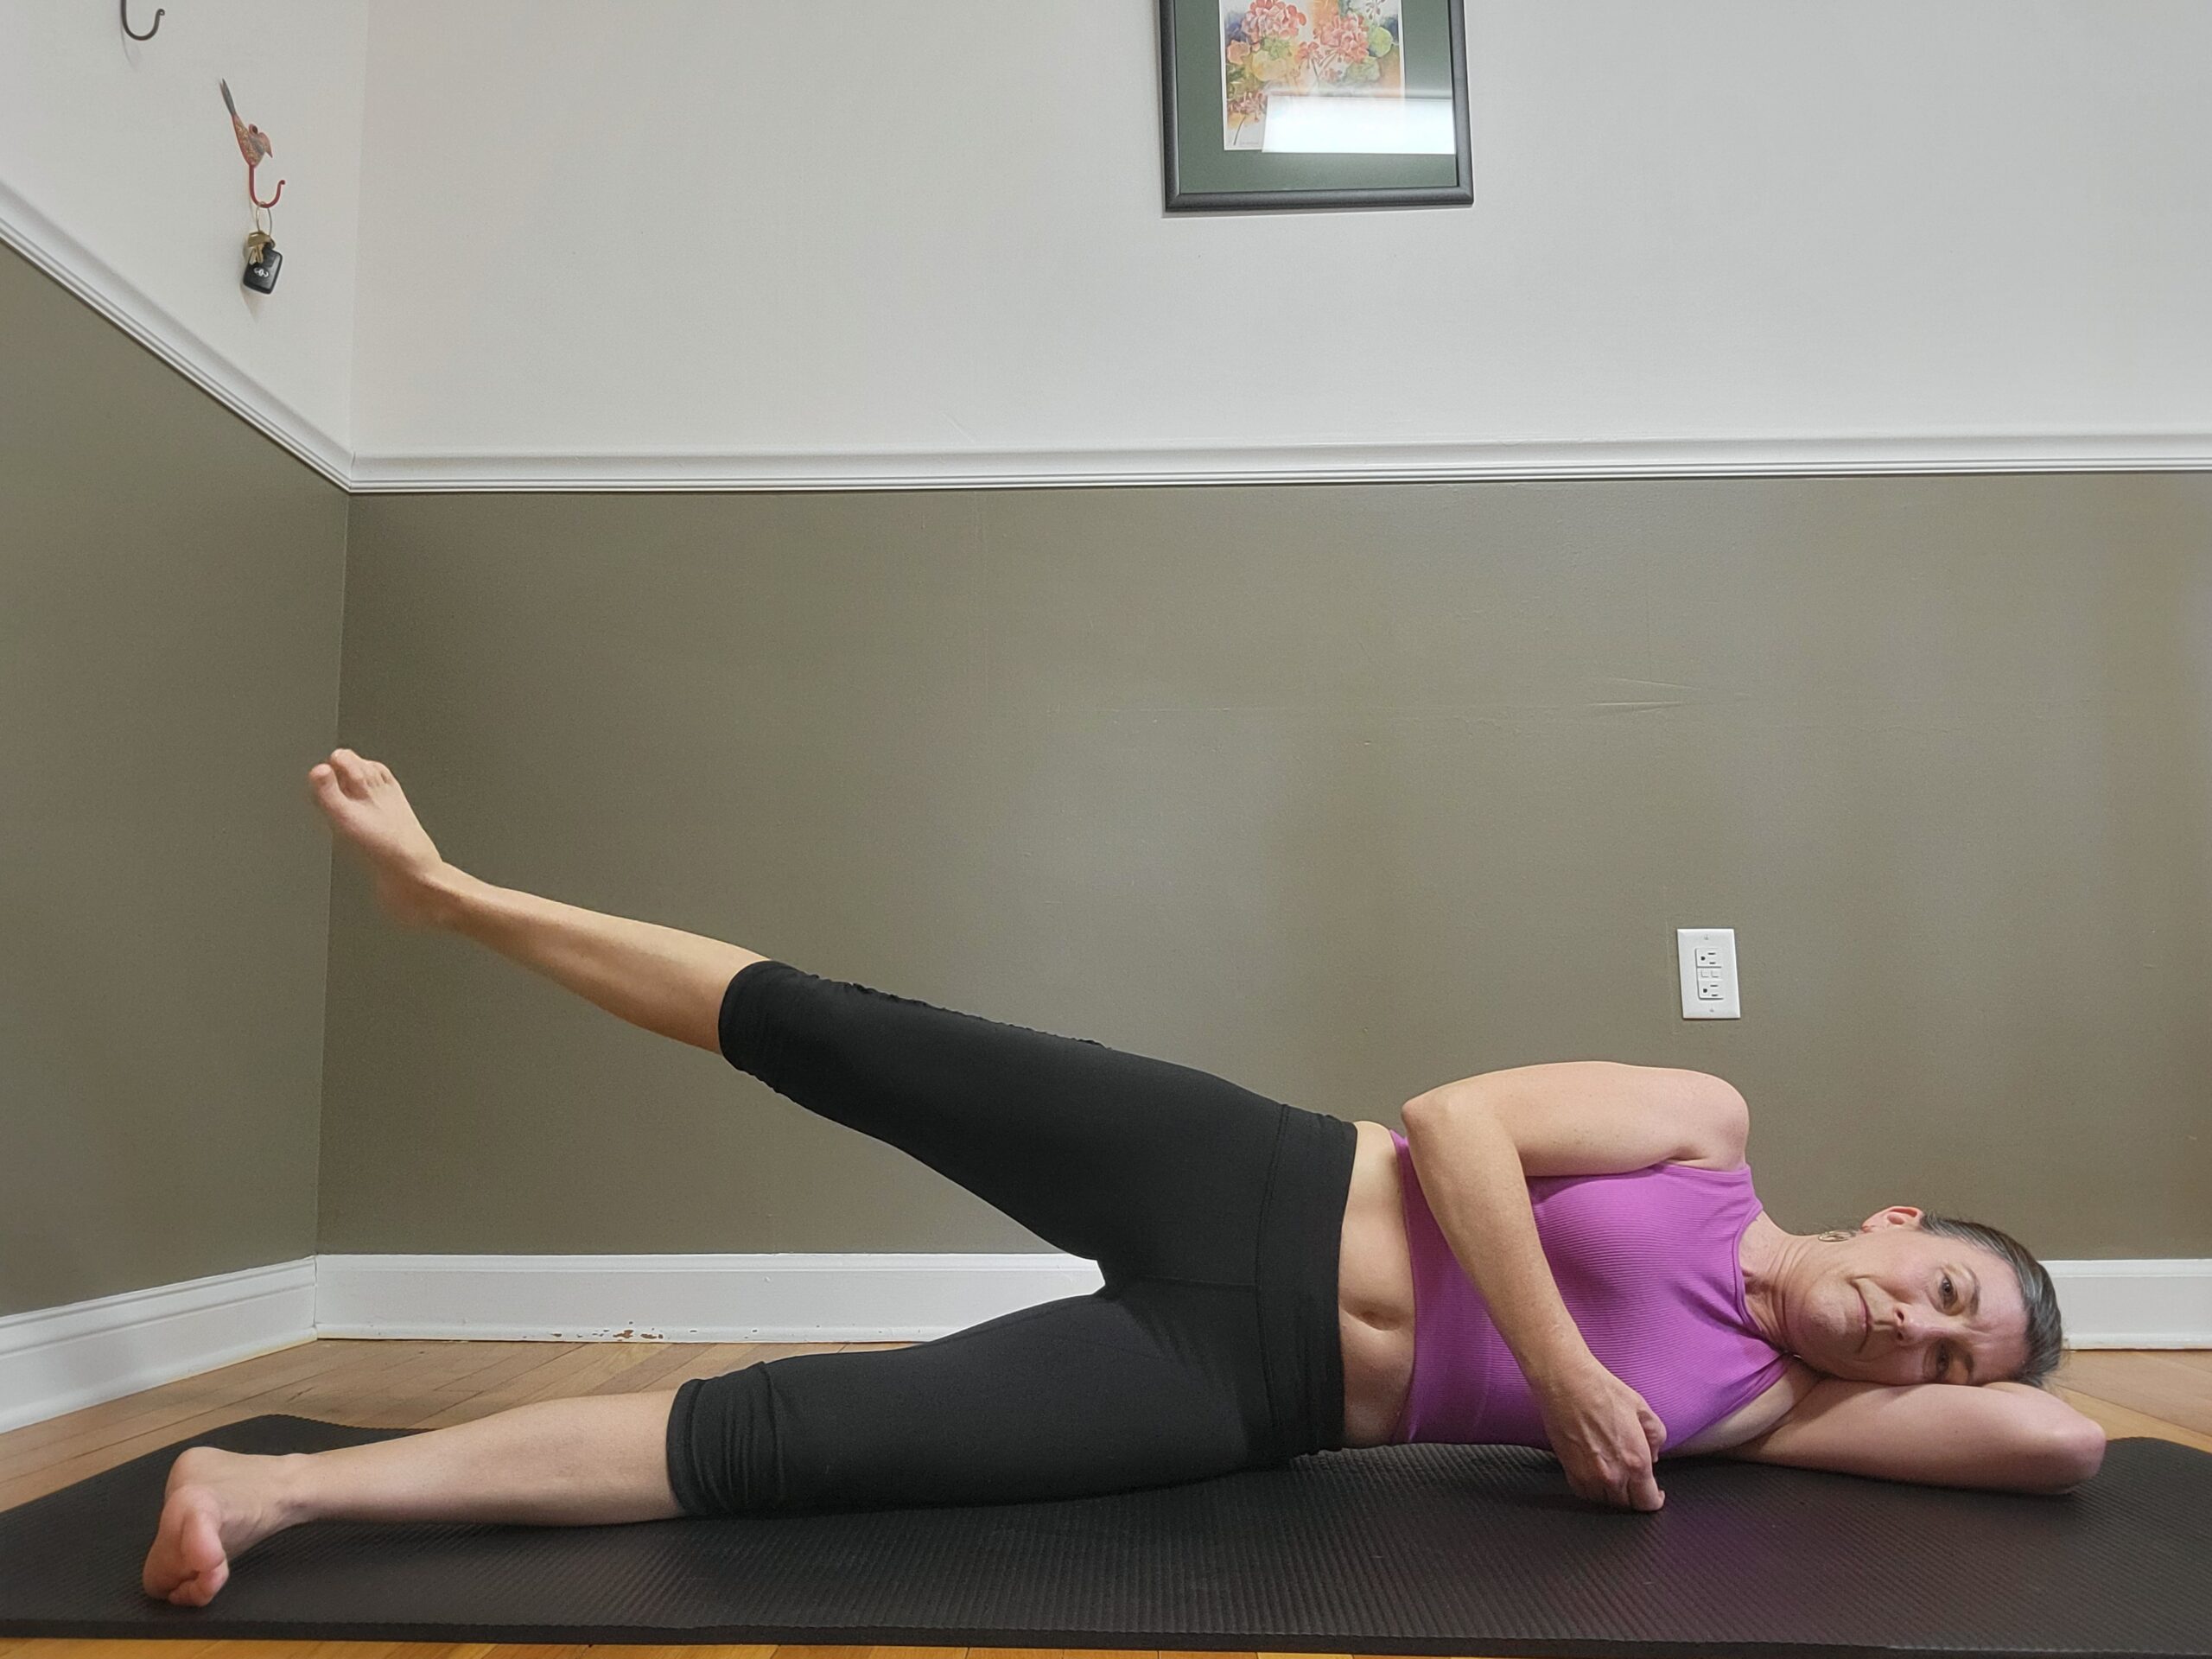
Leg Circles:
- Make cantaloupe to beach ball-sized circle motions with the top leg, maintaining the breathing pattern (inhaling as the leg moves up, exhaling as it lowers).
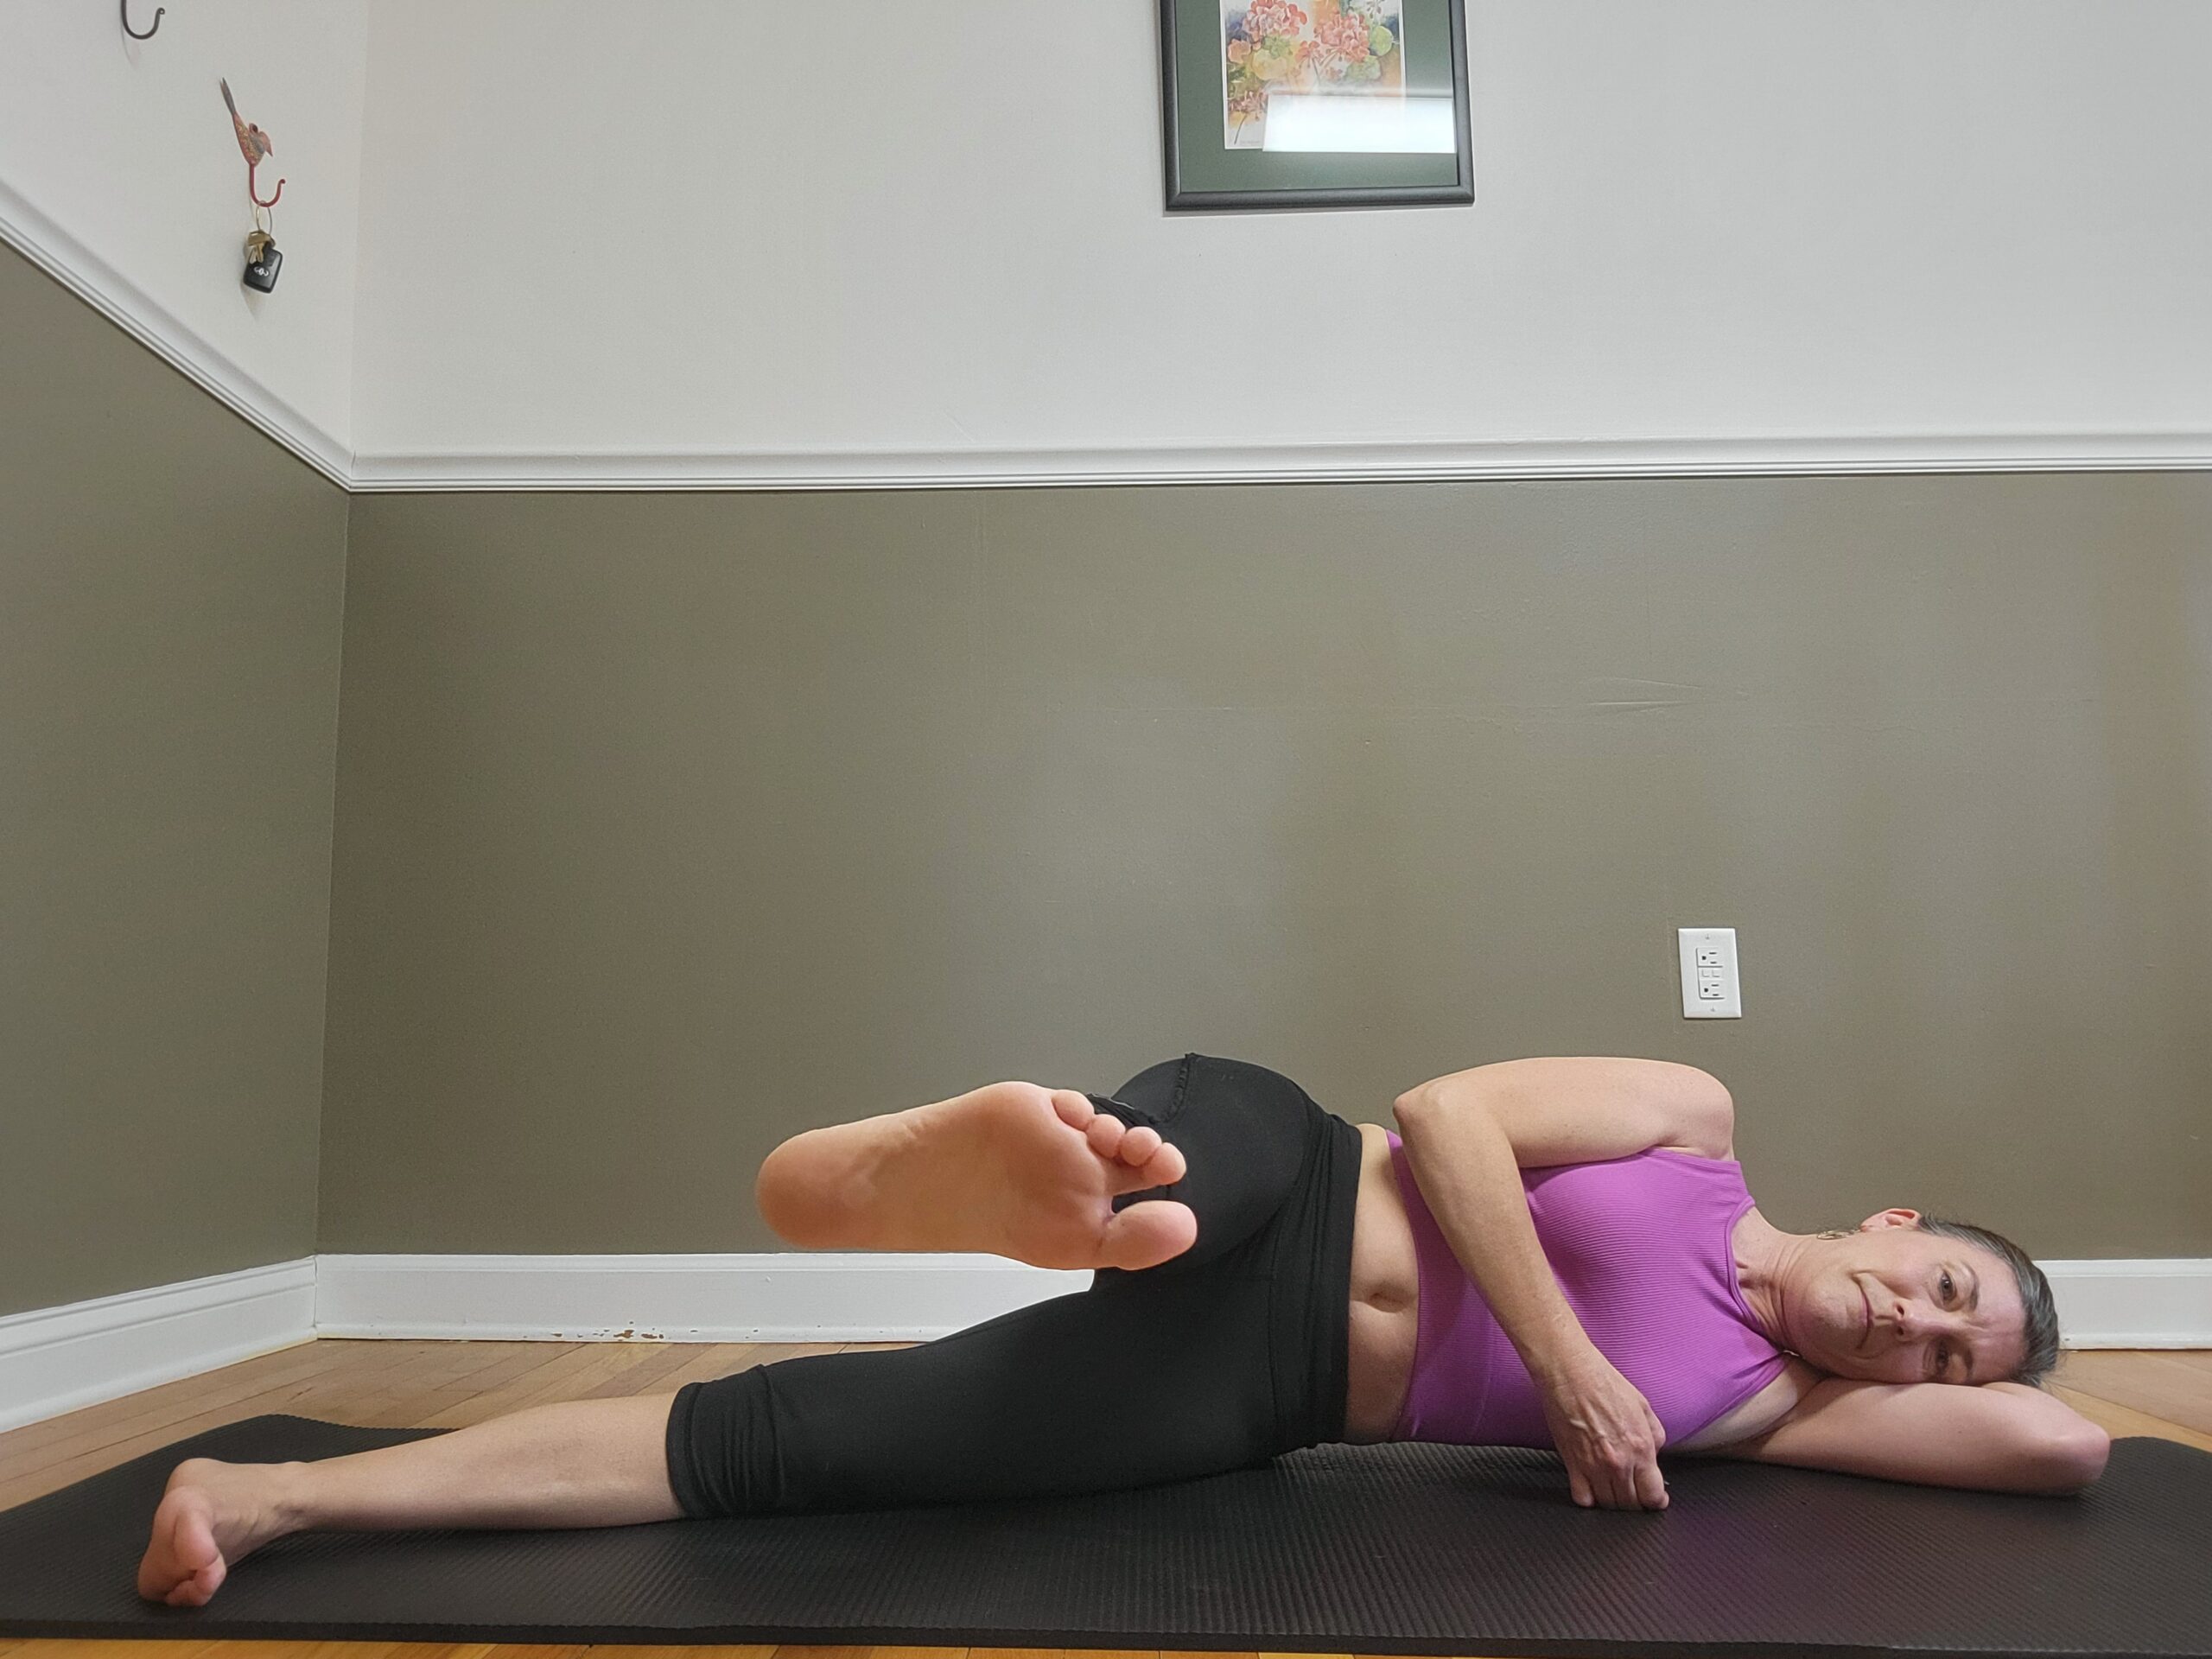
Kicks:
- Lift the top leg to horizontal (level with the hip joint).
- Inhale: Reach the straight leg forward until a stretch is felt along the back of the thigh. Keep the pelvis and back still (no flexing).
- Exhale: Reach the leg back behind the torso. Keep the low back still (no arching).
Key Concepts |
Keep the pelvis and low back stable. Maintain gentle tension in lower abdominals. Keep the thigh neutral or slightly rotated outward. DO NOT allow it to rotate inward. Don’t allow the top leg to drop below horizontal when moving. |
Purpose |
Strengthening hip muscles, teaching hip stability, and training core stability. |
Amount |
1 set for each motion (lifts, circles, kicks); 5–10 repetitions of each; complete all sets for one leg before switching sides. |
Single Leg Kicks

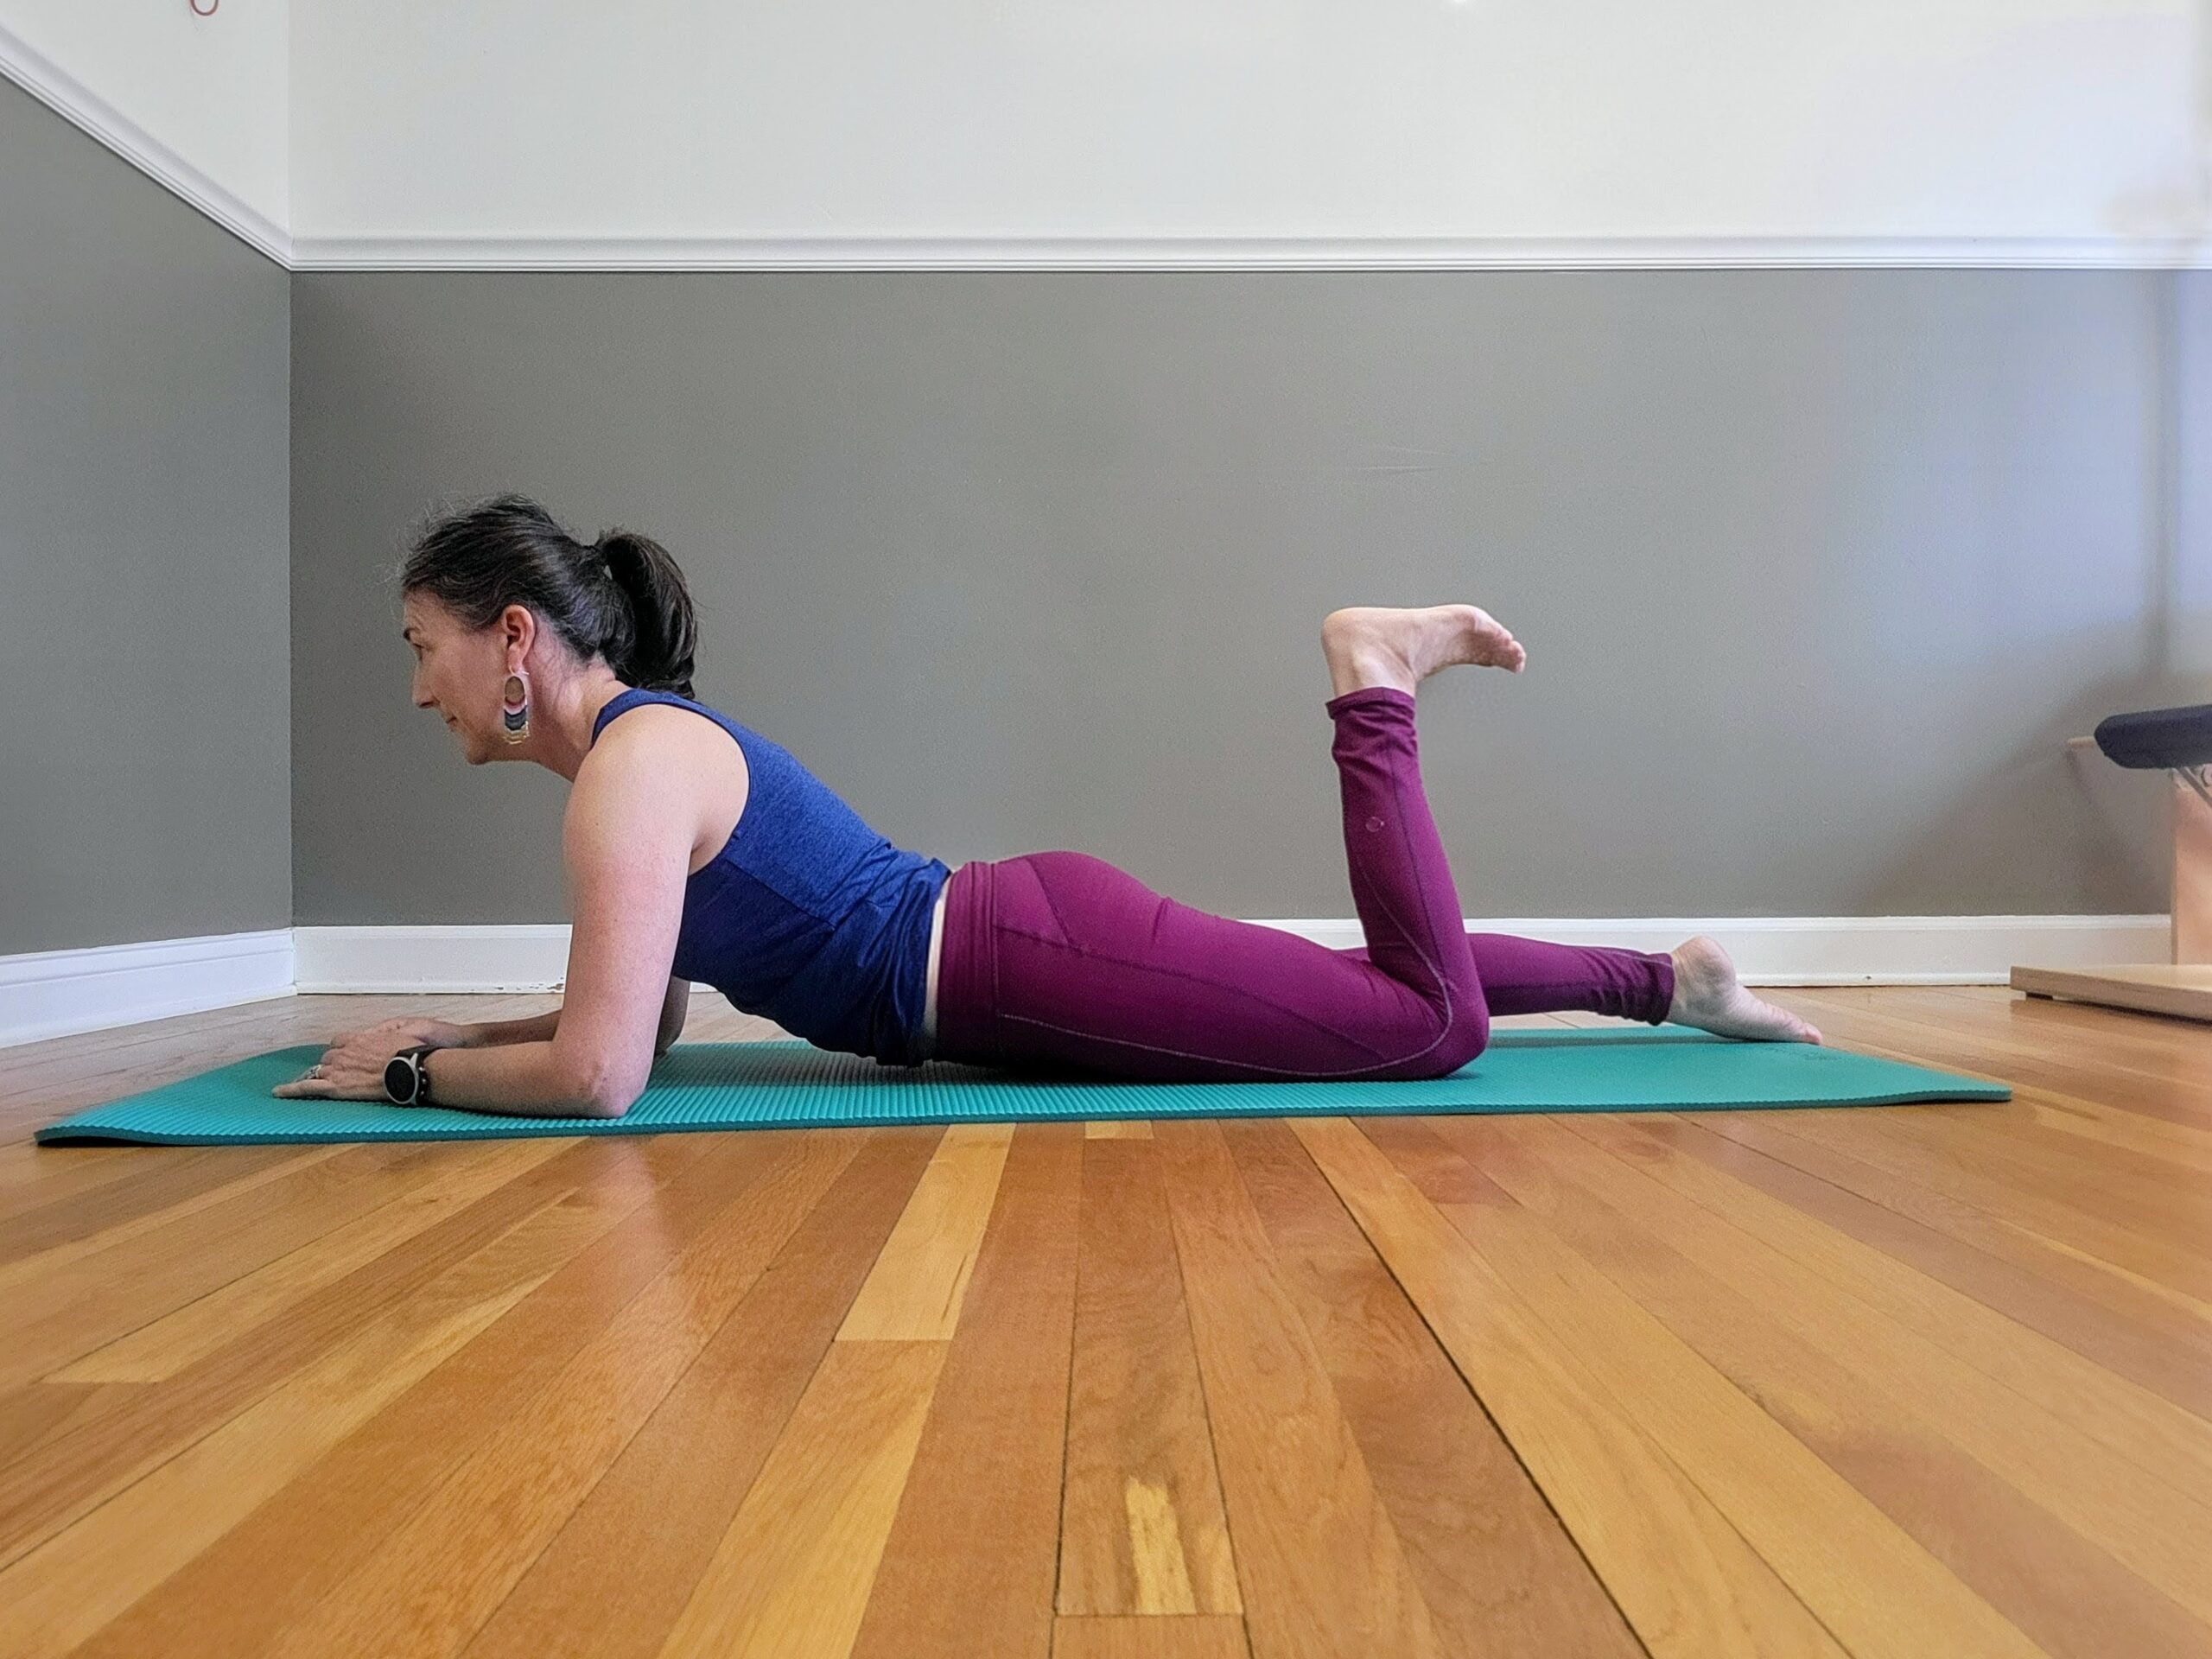
Setup:
- Lay on your stomach. Prop up on your forearms with hands together at the midline.
- Draw your shoulder blades down as though pushing the ground away with your forearms.
- Keep your lower abdominal muscles gently contracted to protect your lower back.
Movement:
- Inhale: Bend one knee to pull the heel toward the buttock in 2 pulses.
- Exhale: Extend the leg back out to straight, feeling a lengthening of the leg.
- Alternate sides between each repetition.
Key Concepts |
Keep lower abdominal muscles active to keep the spine stable. Keep the shoulders low (no shrugging). |
Purpose |
Strengthening hamstrings, stretching the muscles along the front of the leg, stabilizing the core, and stabilizing shoulder blades. |
Amount |
5–10 repetitions each side, 1 set. |
Scapular Protraction/Retraction
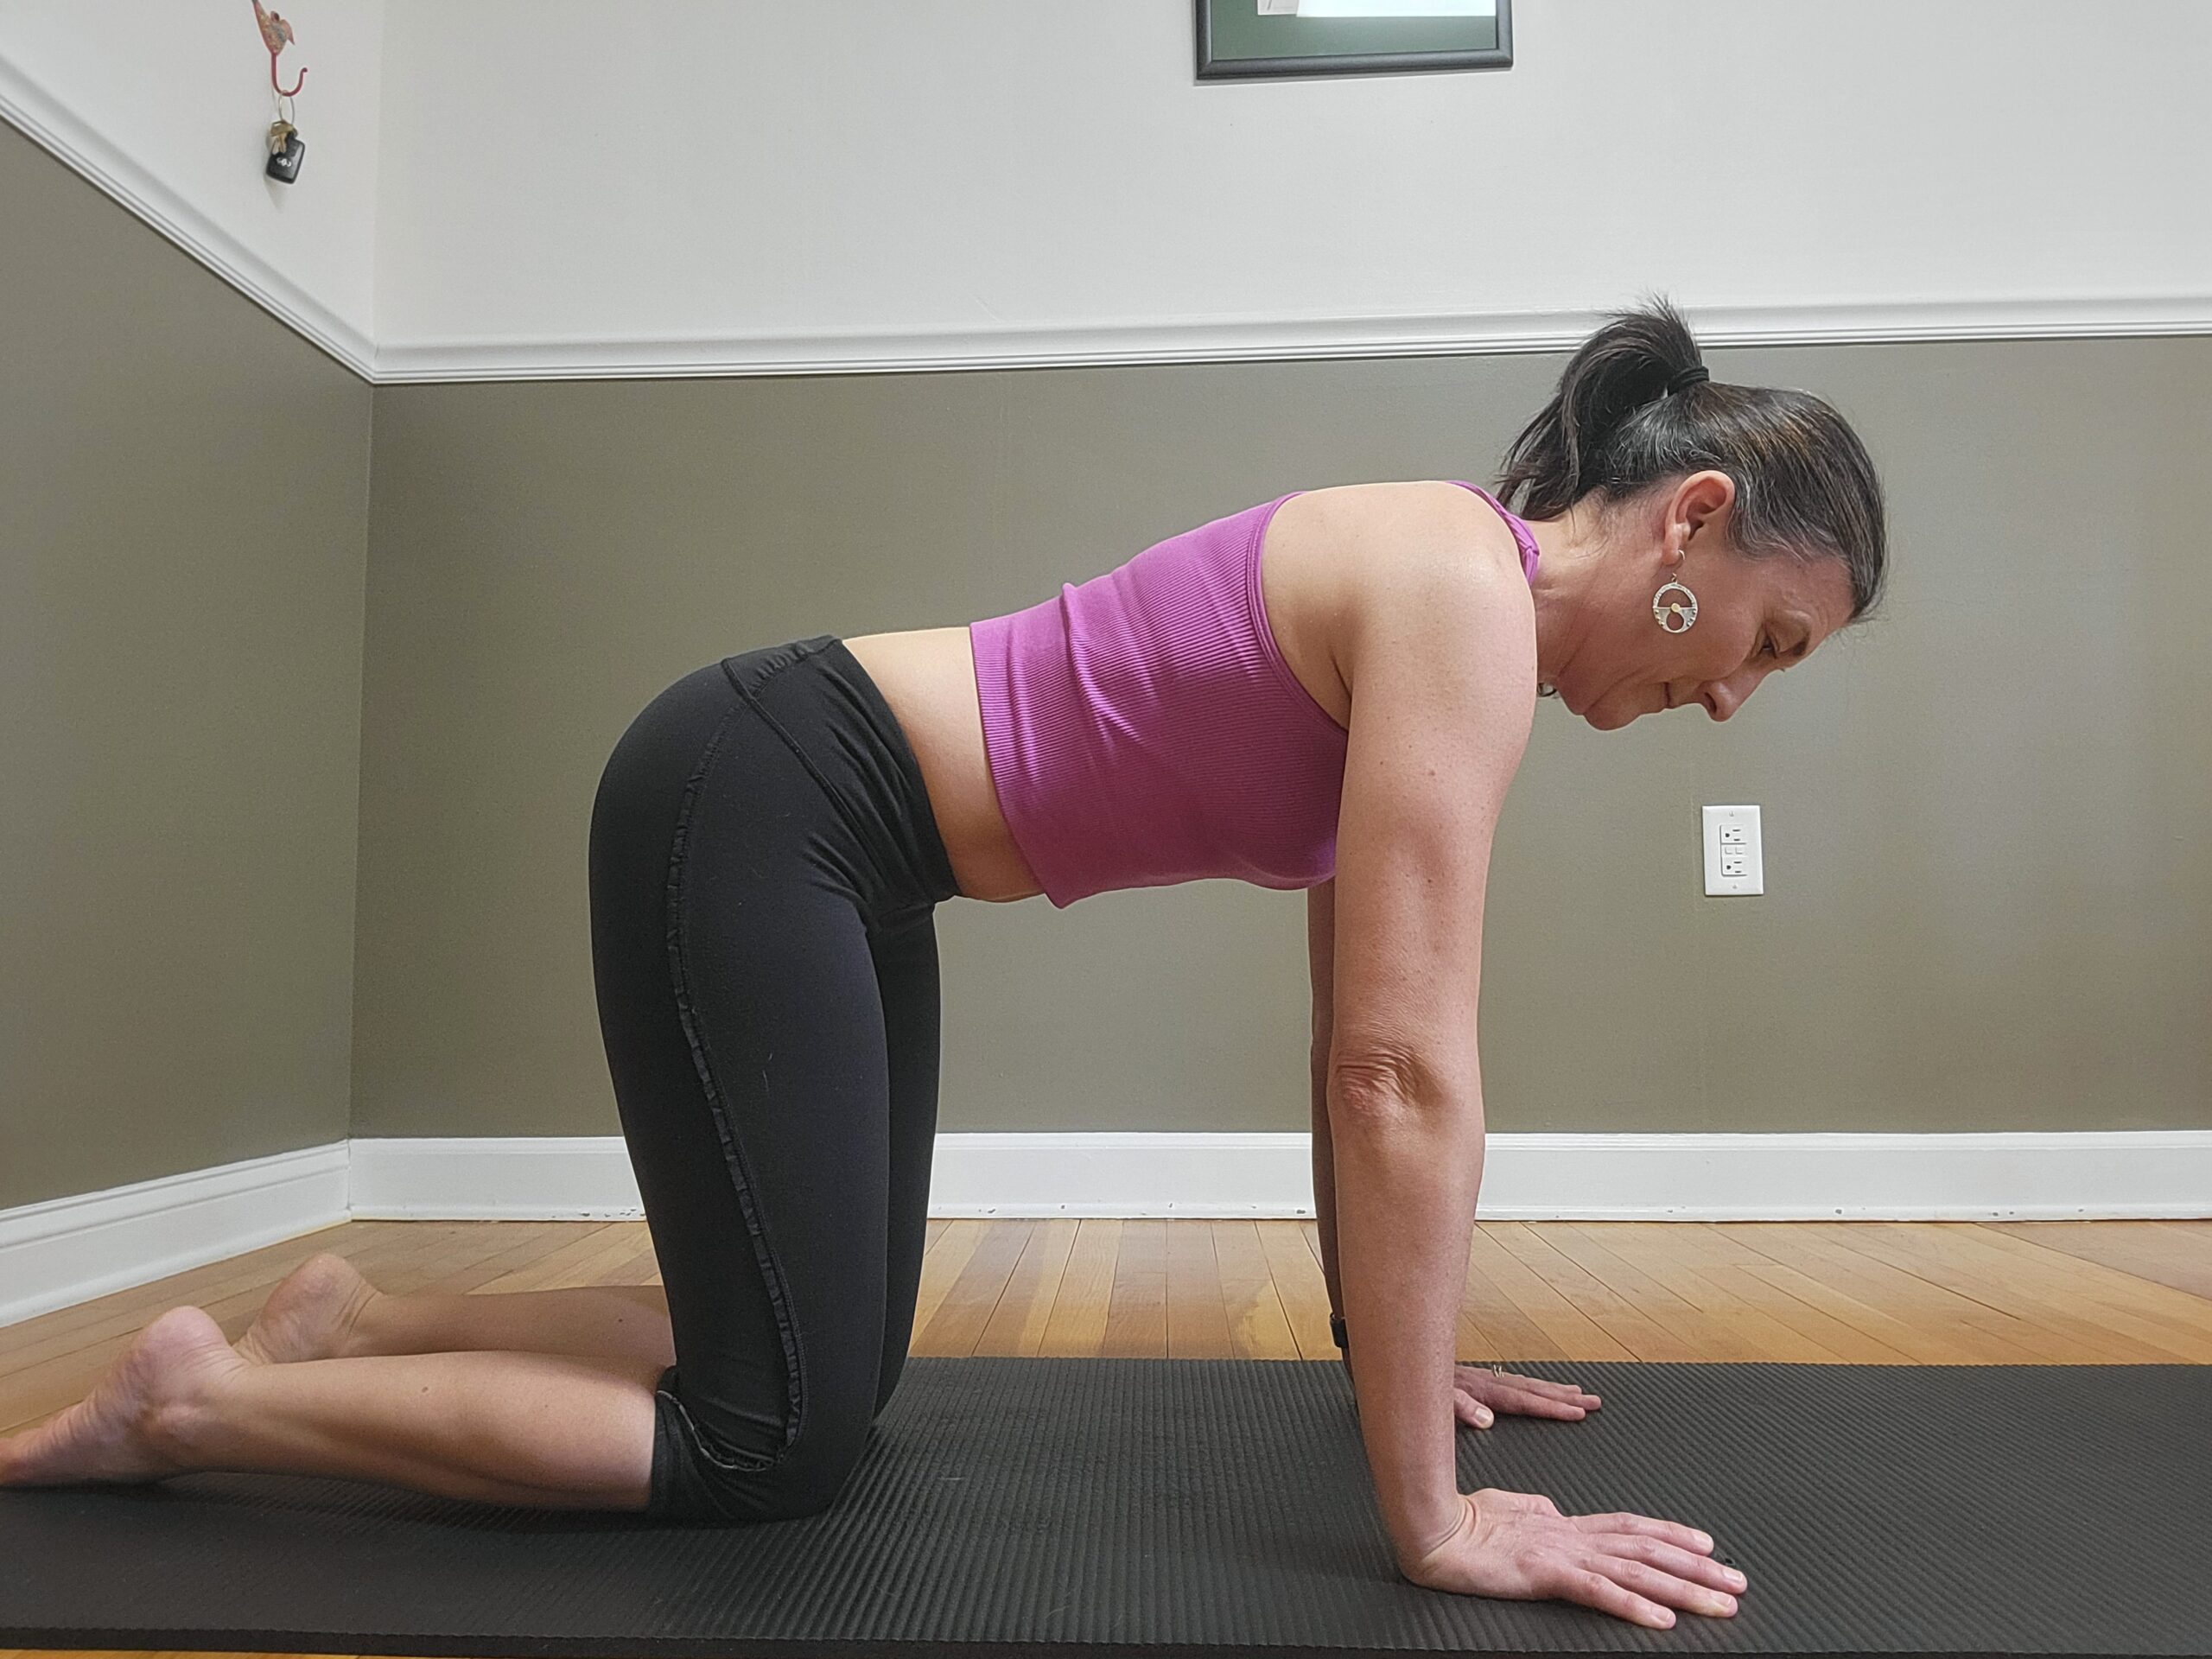
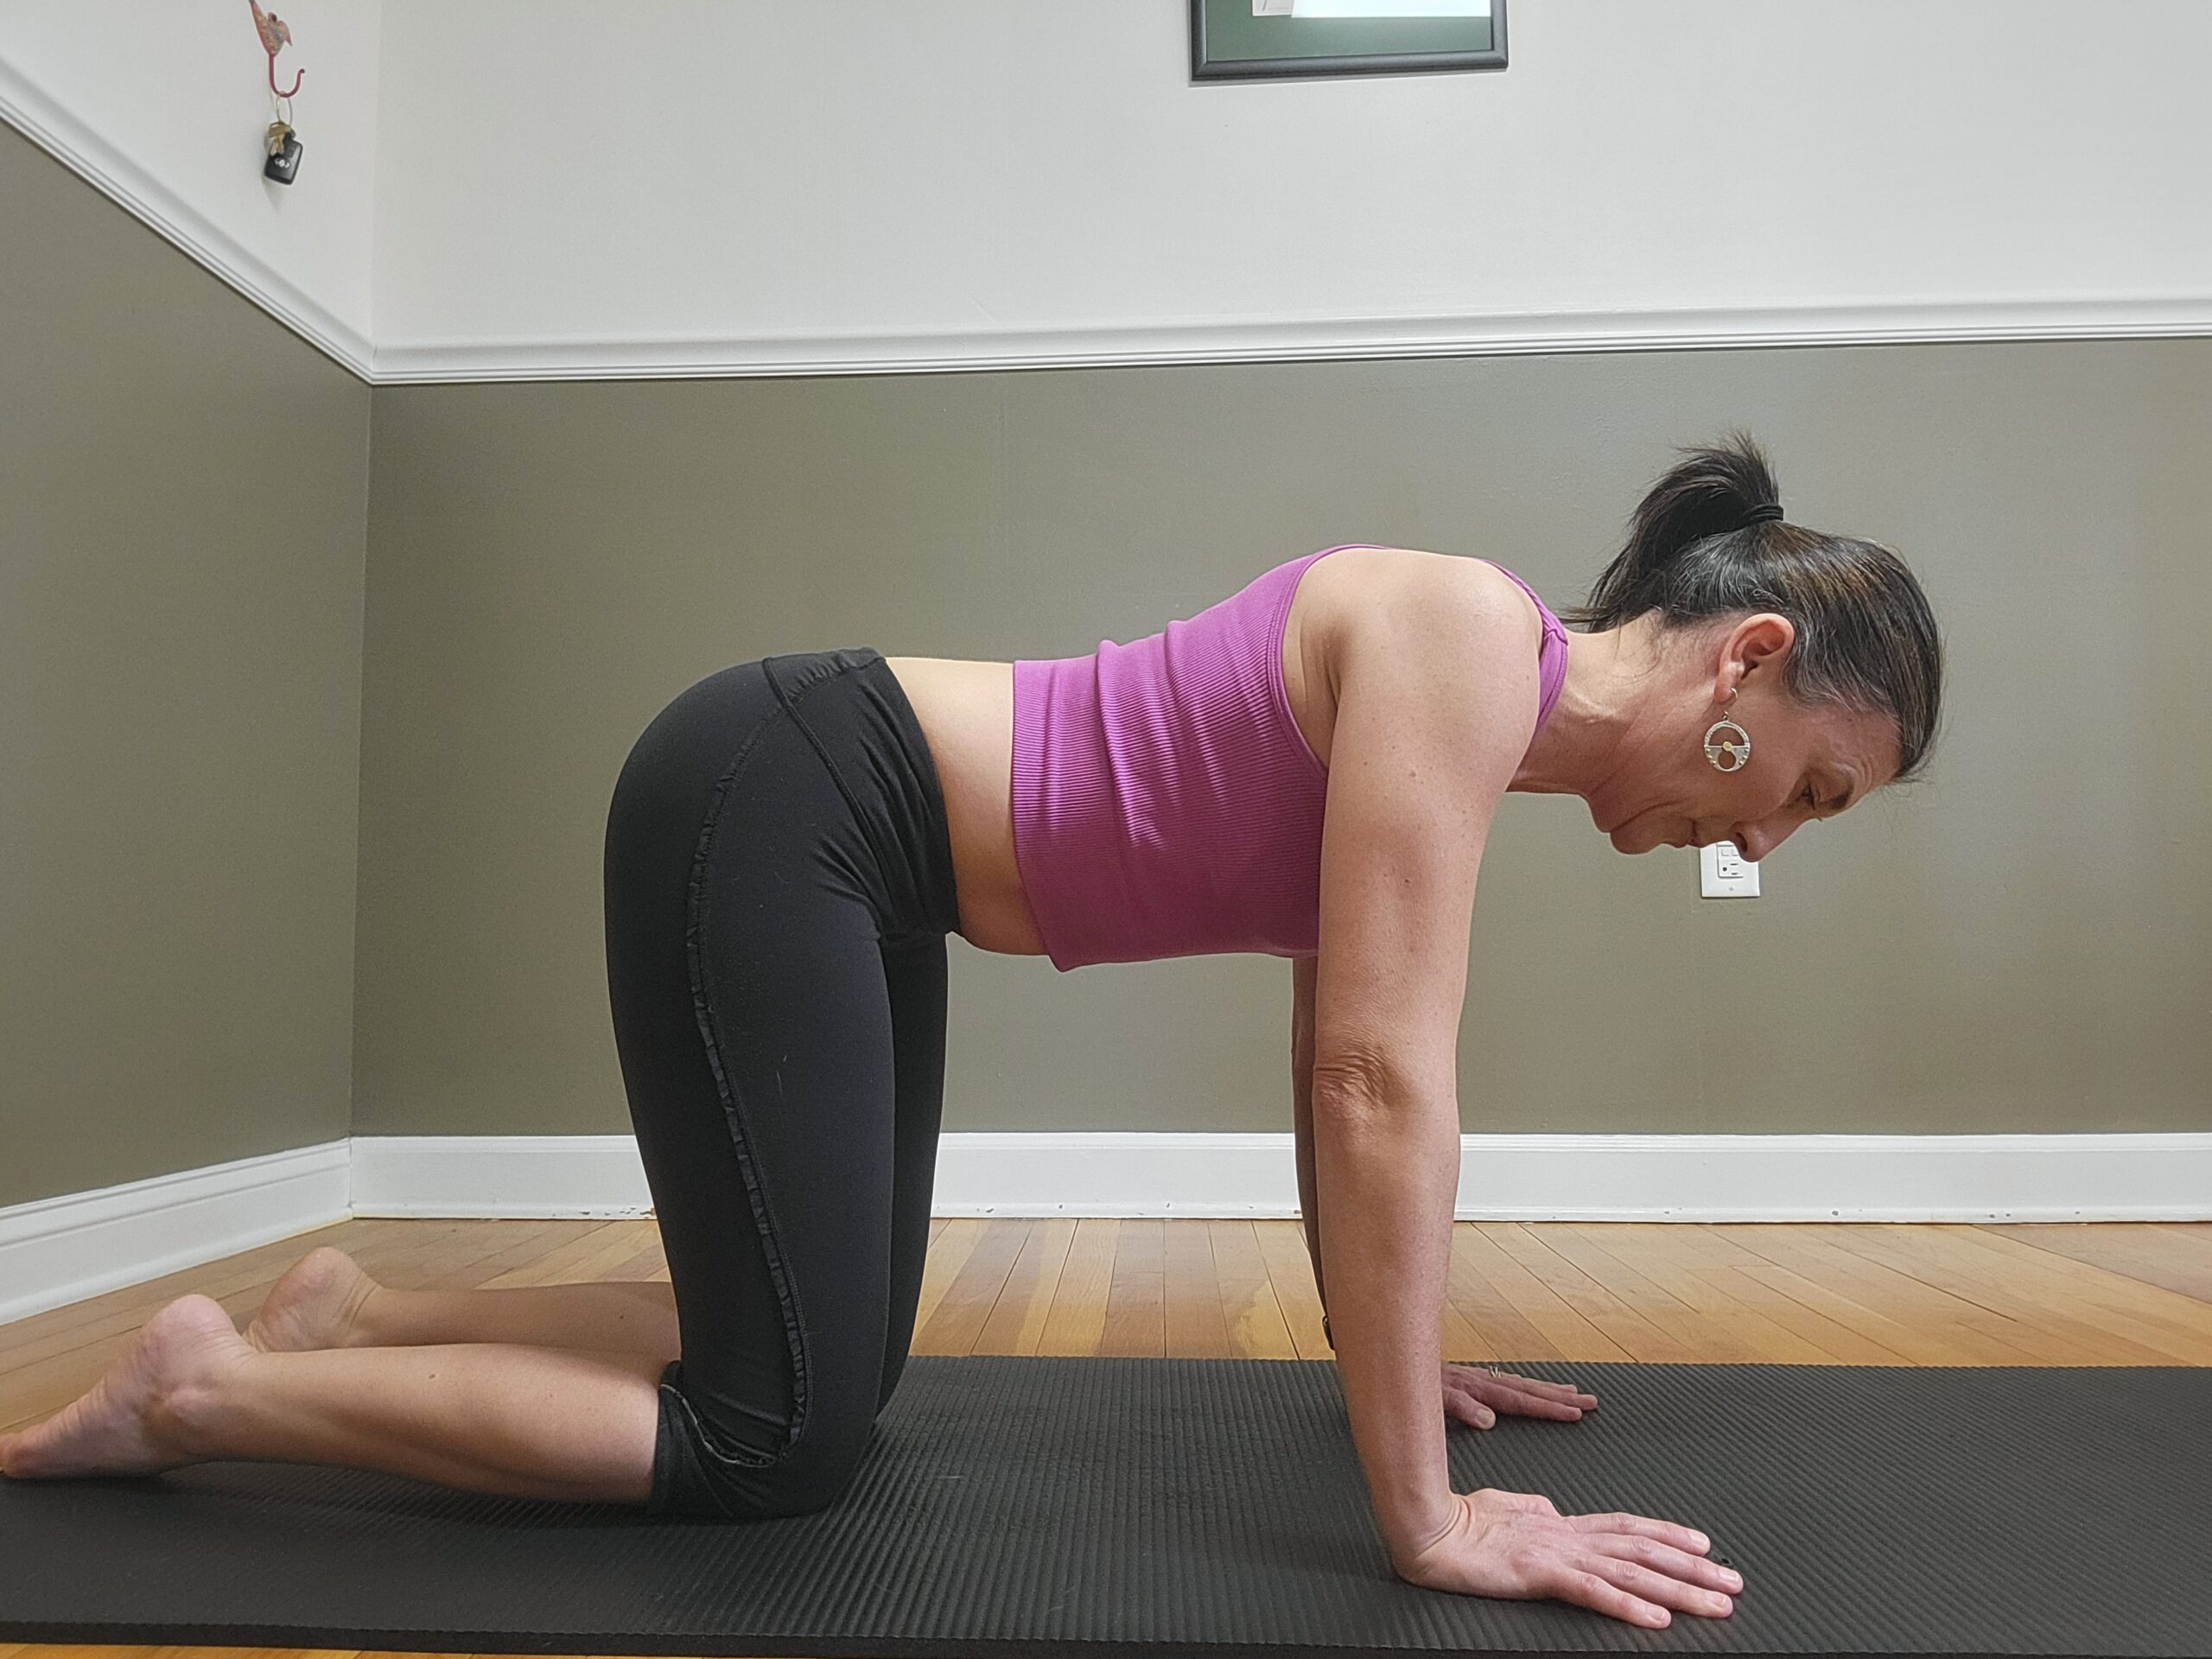
Setup:
- Start on your hands and knees (quadruped position) with hands directly underneath your shoulders and knees directly under your hips.
- Find a neutral spine position (no arching or sagging).
- Draw the shoulders away from the neck towards the hips.
Movement (Quadruped/Hands and Knees):
- Exhale: Glide the shoulder blades forward and away from each other (“like pushing the floor away”).
- Inhale: Slide the shoulder blades backward and toward each other.
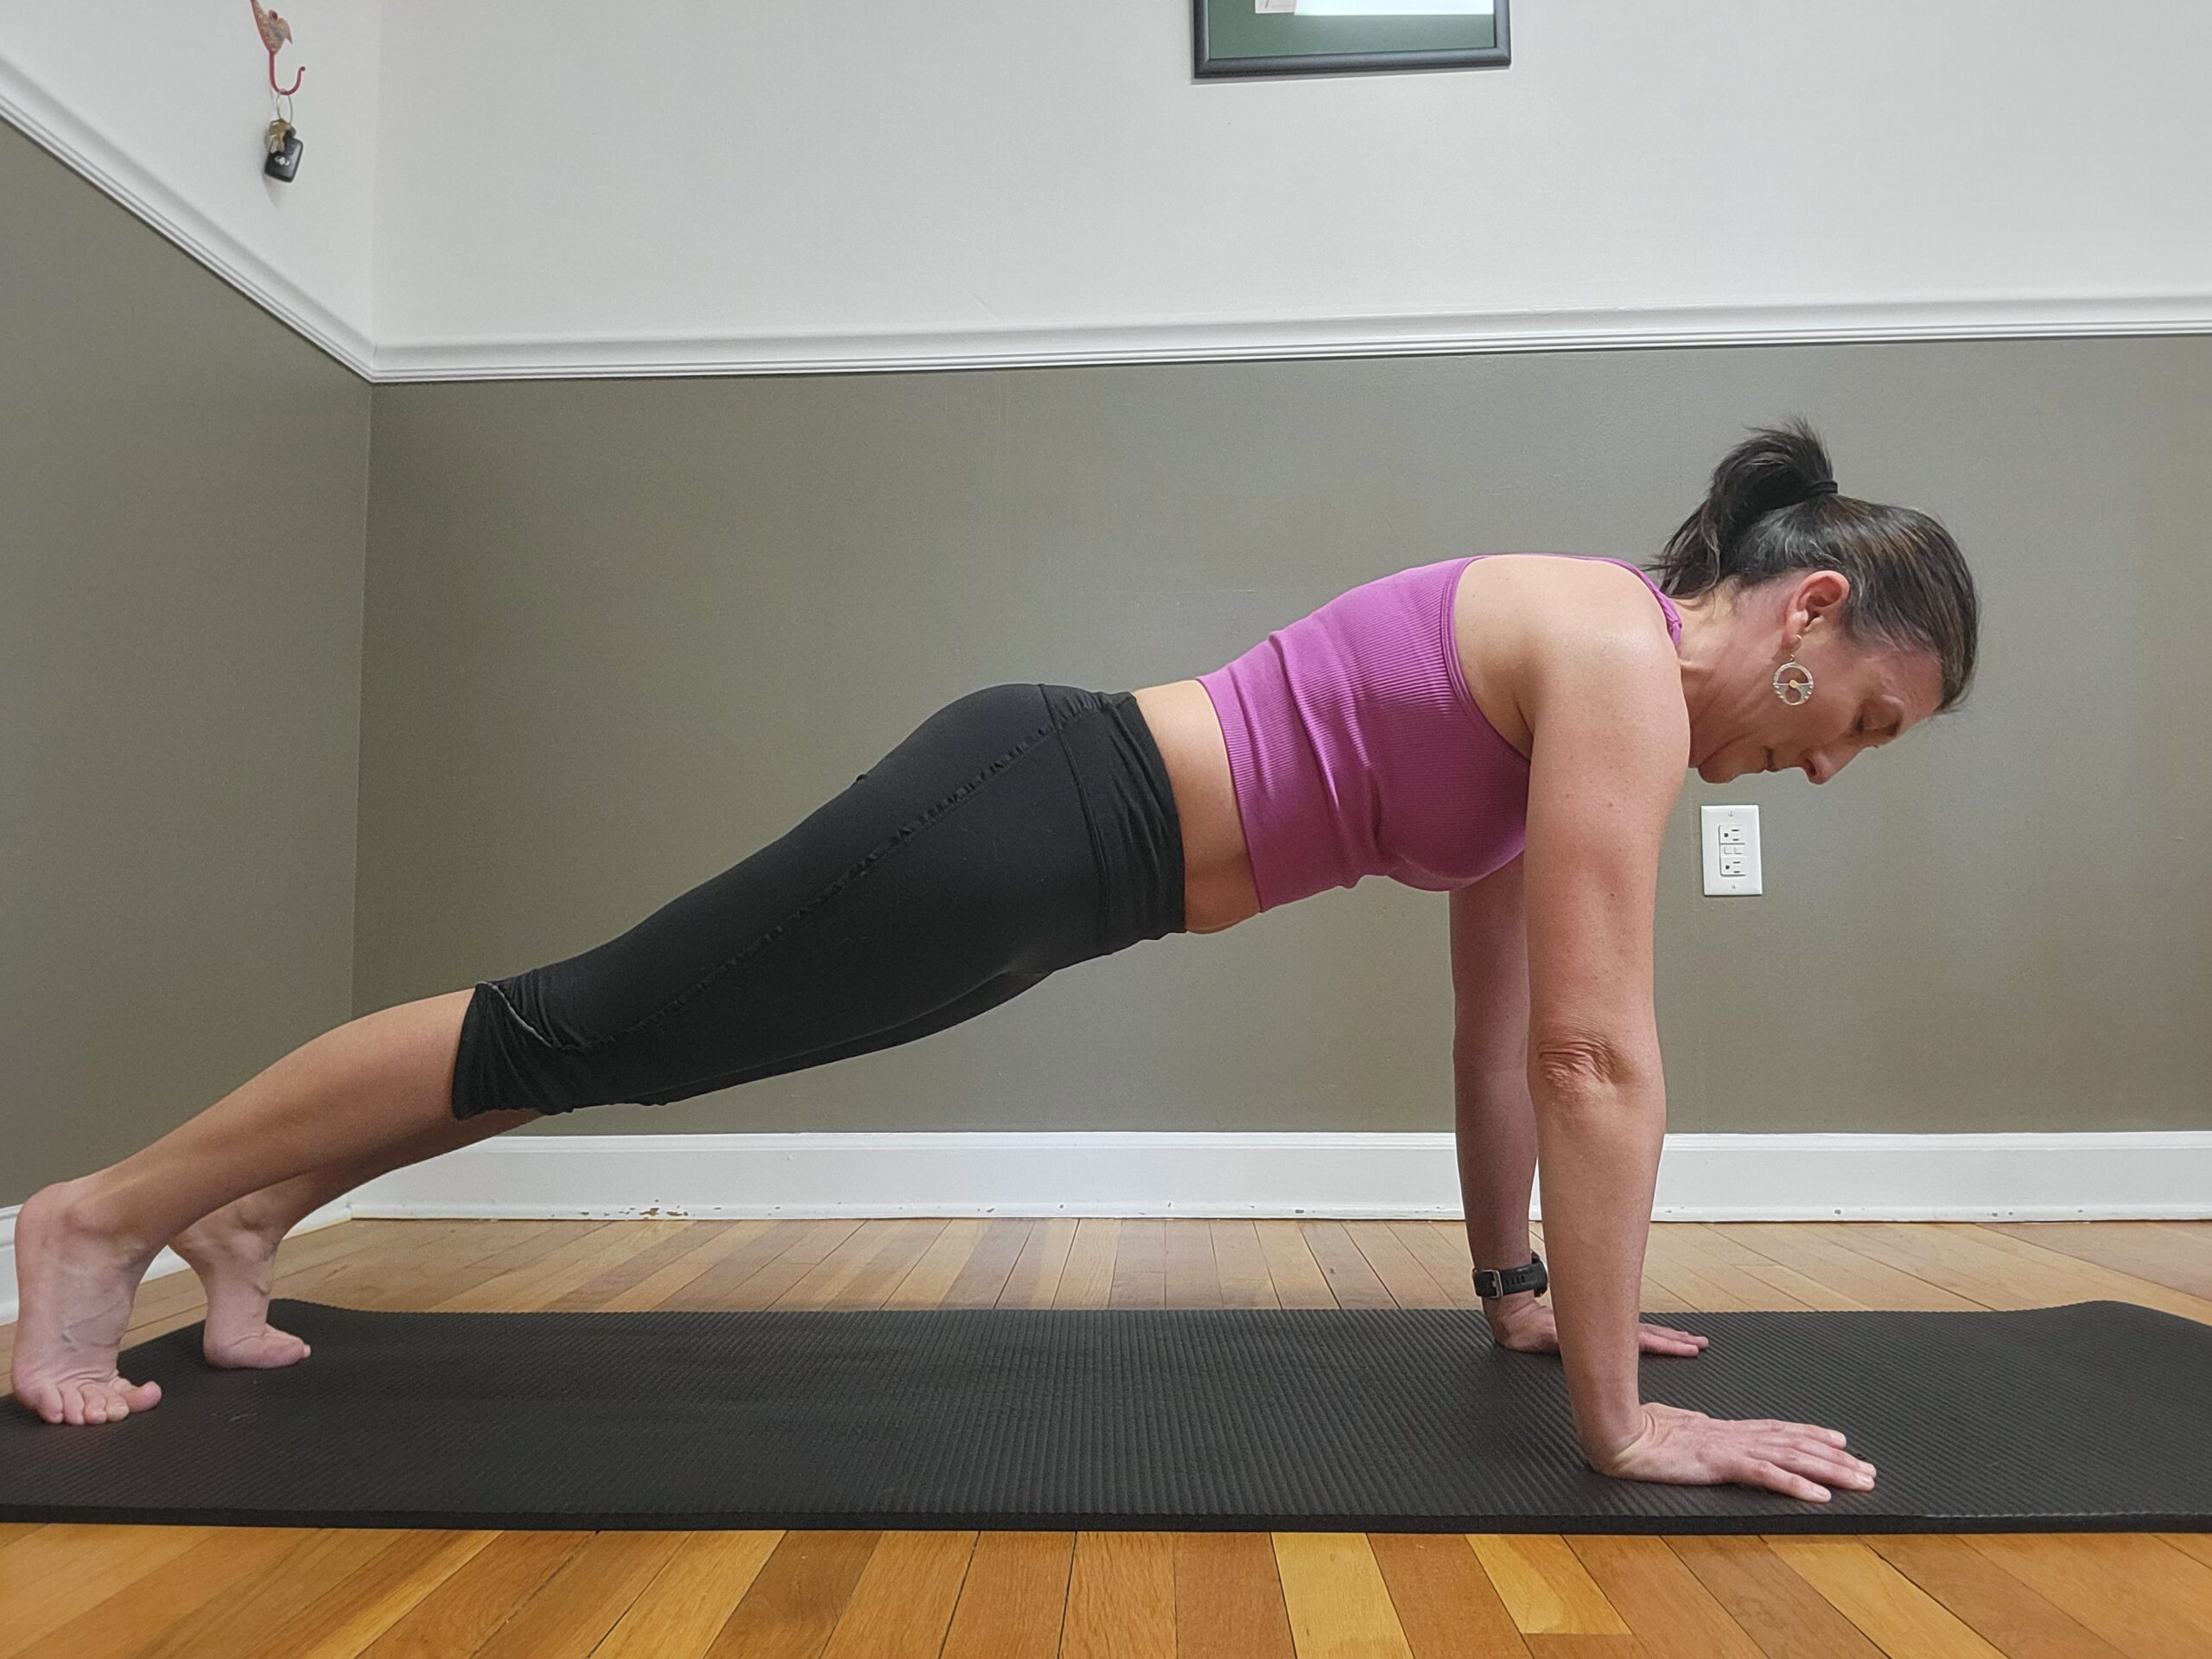
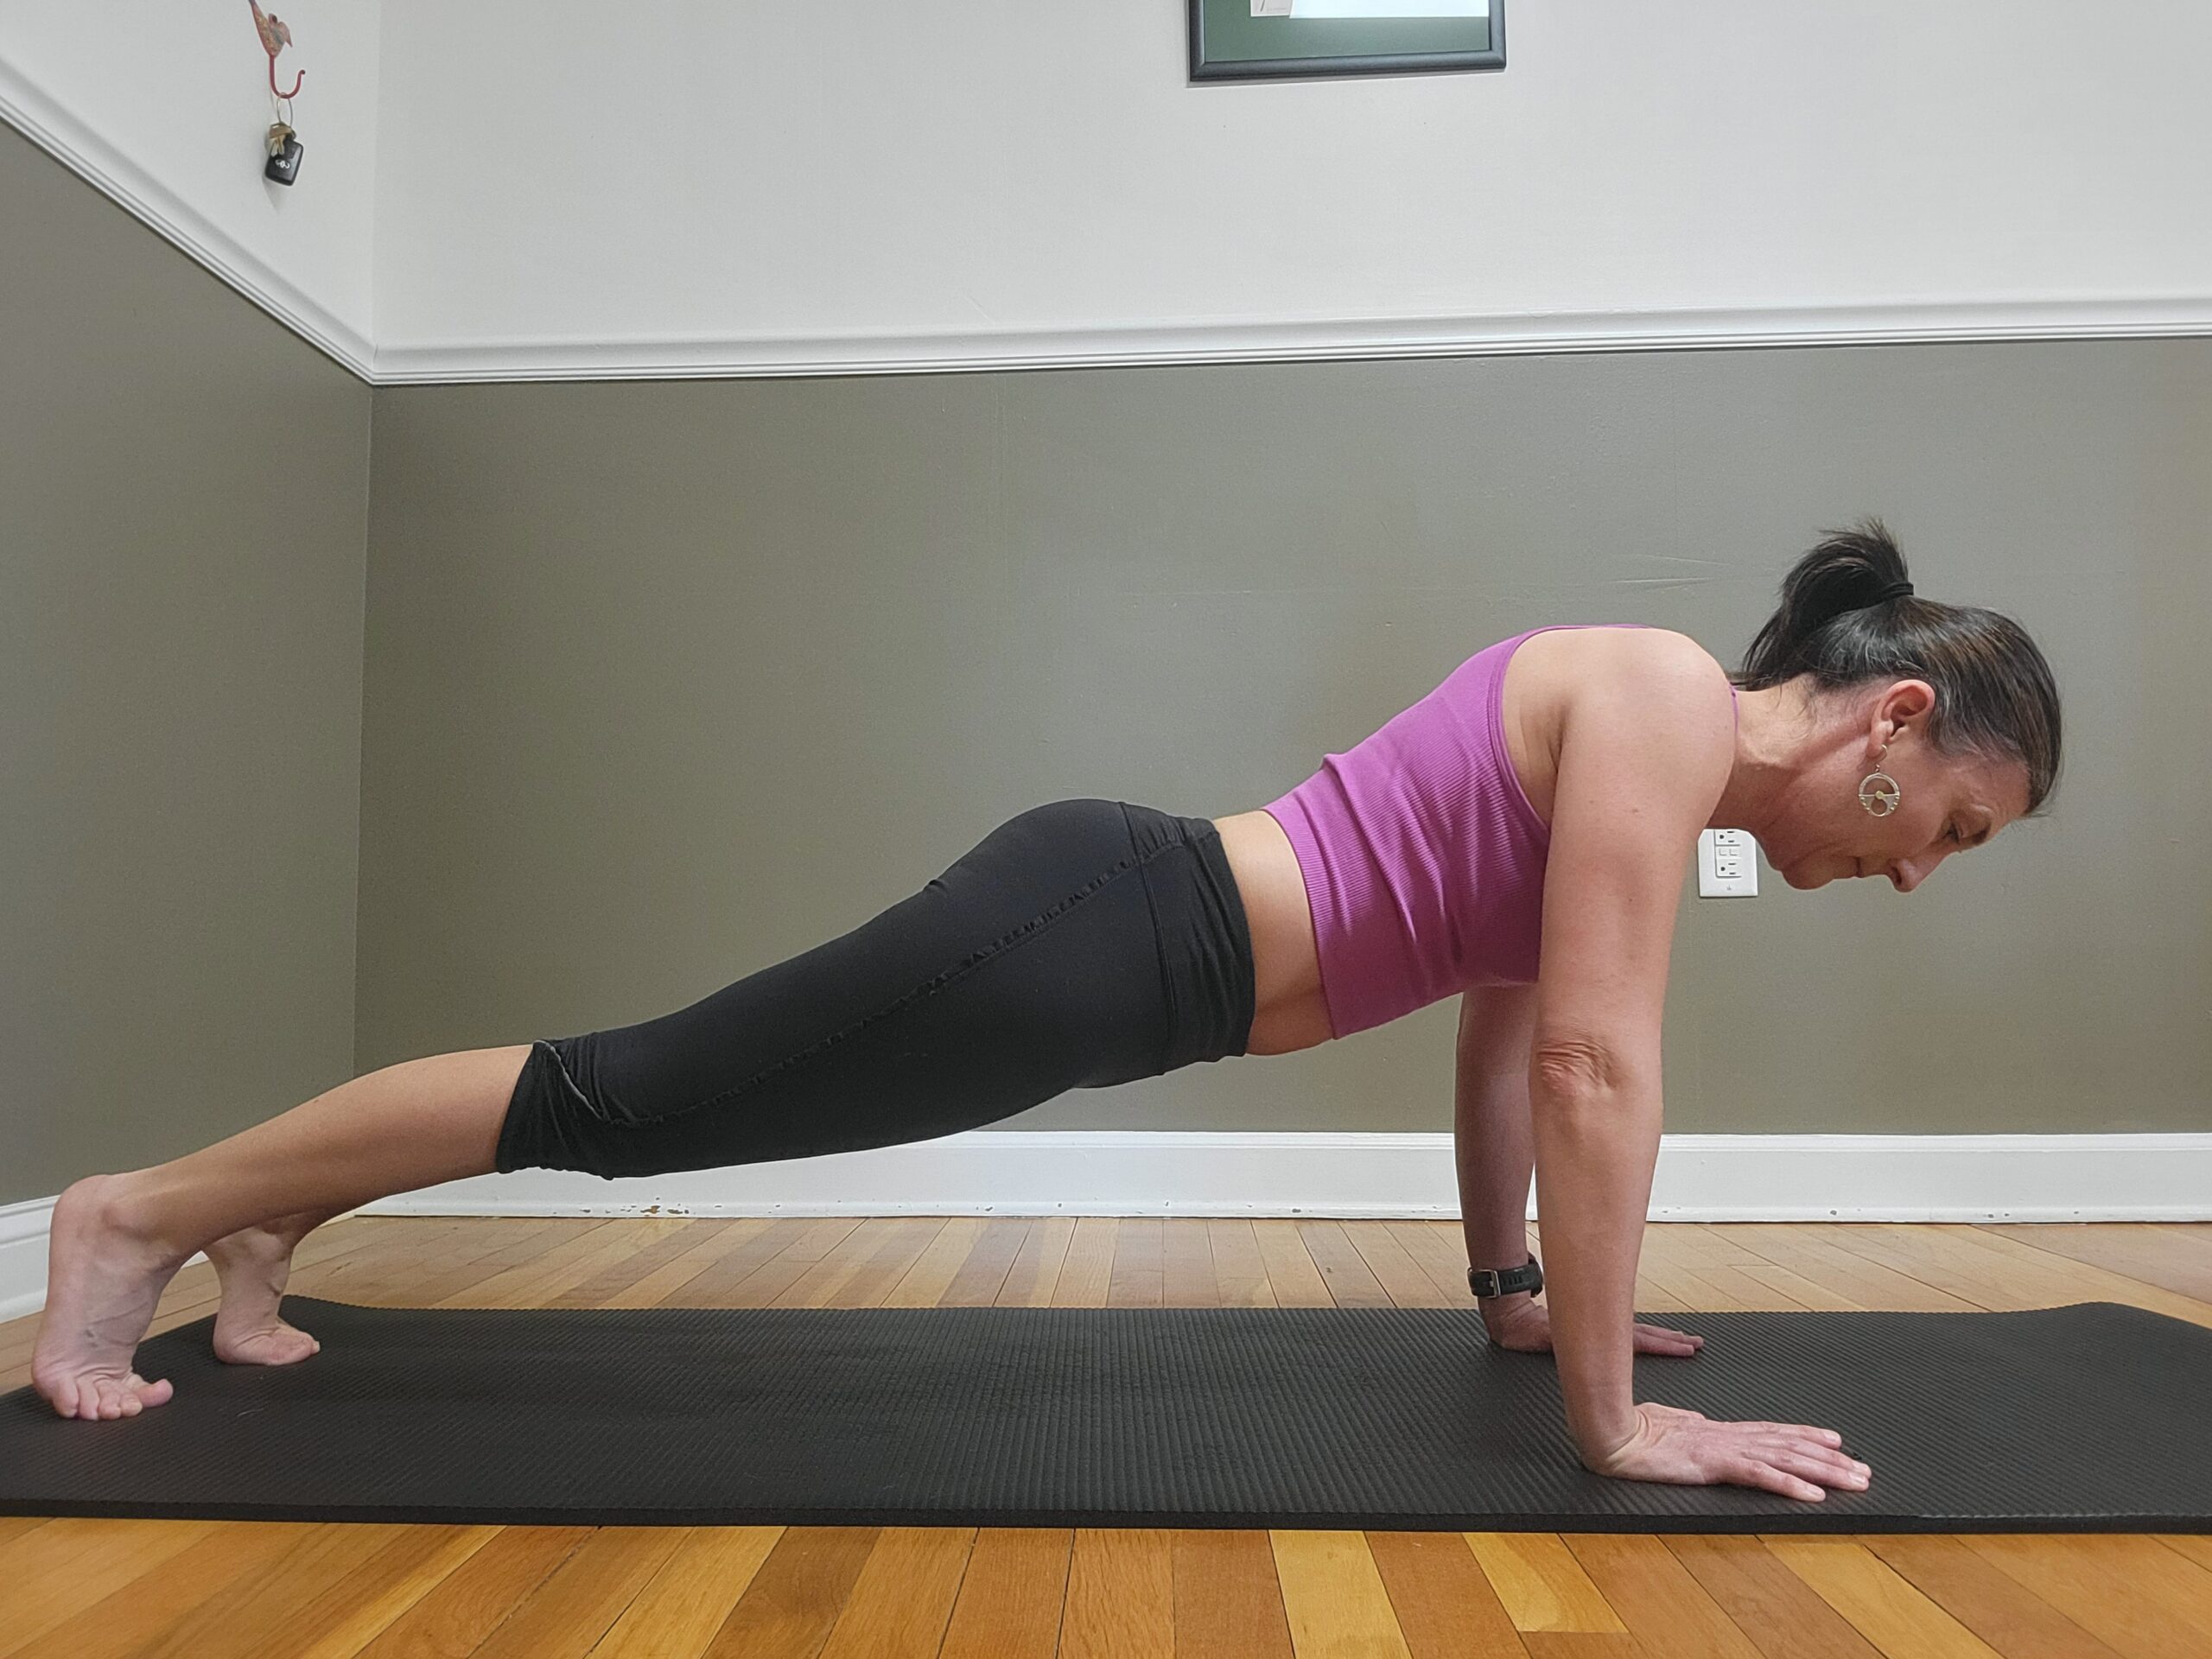
Plank Position (Advanced):
- From hands and knees, extend one leg back, then the other, so your torso forms a straight line from the tailbone to the crown of the head. Hands stay directly under the shoulders. Lengthen the back of the neck to slightly tuck the chin, then perform the protraction/retraction.
Key Concepts |
The low back position doesn’t change. The shoulder blades are creating the movement. No shrugging. |
Purpose |
Teaching shoulder stability and core strength. |
Amount |
5–10 repetitions, 1–2 sets. |
***These exercises are of the strength training type. For best results, they should be done 2-3 times per week.
Wrapping Up: The Trail Awaits
So, is that the full list? Absolutely not! These five exercises are a good sample of the many Pilates-based movements beneficial for mountain bikers. A blog post can’t be a book, after all. And while these are excellent for the average rider, every exercise can be modified to be easier or harder, depending on your individual needs.
The main takeaway here is to begin with some basics. These exercises are a primer, specifically designed to target the multiple muscle groups we rely on when we ride. The time you invest in this preparation is a direct investment in injury prevention—and maximizing the fun you have out on the trails.
Happy riding!